Those in the market for a high-end white gaming PC have a vast range of excellent components to choose from. Manufacturers like Gigabyte offer many white-themed parts, such as their AERO graphics cards range or ICE-branded motherboards and CPU coolers.
The RTX 4080 SUPER AERO OC model is the star of this high-end gaming PC build, providing excellent performance at 1440p and 4K while offering a sleek white aesthetic that takes centre stage of this system.
This PC build guide explores the process of assembling this system, explaining our individual component choices and why they’re such an excellent fit for this white system.
We’ve also included the expected performance metrics towards the end, showcasing the kind of framerates you should expect from the RTX 4080 AERO OC edition!
Build Process
Step 1: Installing the CPU
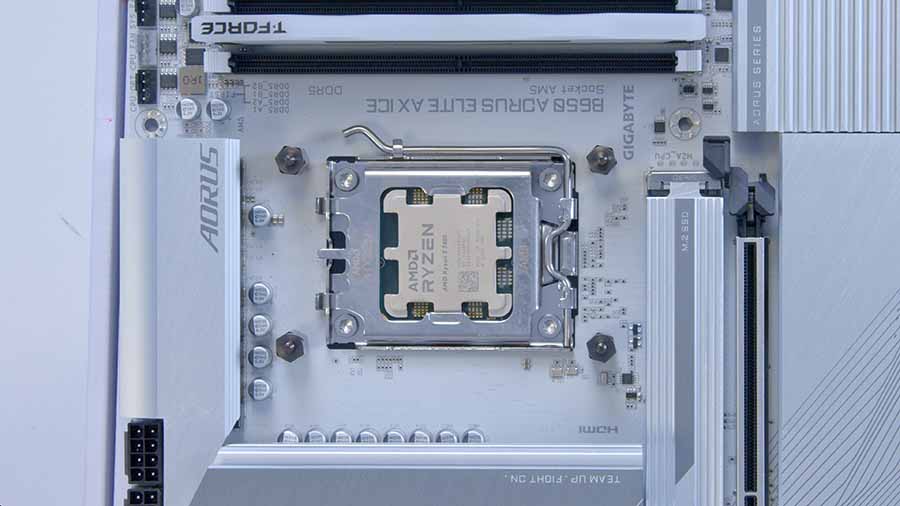
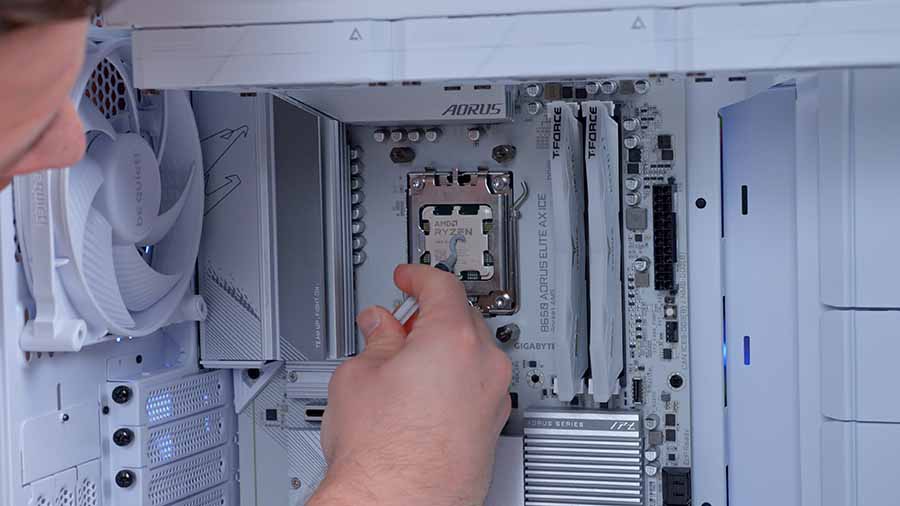
For our CPU, we’ve picked out the Ryzen 7 7800X3D, which is one of the best gaming CPUs on the market. The 3D V-Cache technology is what makes the Ryzen 7 7800X3D one of the strongest competitors in modern AAA games, hence why we’ve picked it out for this system.

We’ve also chosen the Gigabyte B650 AORUS Elite AX ICE board for this PC build. We recommend taking the motherboard out of its anti-static bag and placing it on the box to start building; this provides a clean, soft surface on which to build without damaging the motherboard.
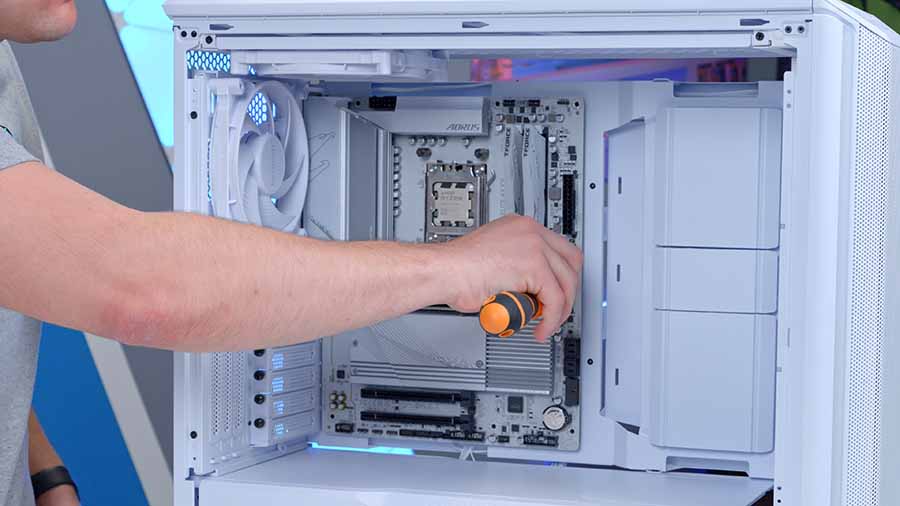
Lift the retention arm on the CPU socket and raise the cover. Grab the CPU by the sides, find the golden arrow at the top left of the CPU, and line it up with the same arrow on the motherboard’s CPU socket; they should be facing in the same direction. Then, lower the CPU into the socket, and it should drop into place with no additional movement required.
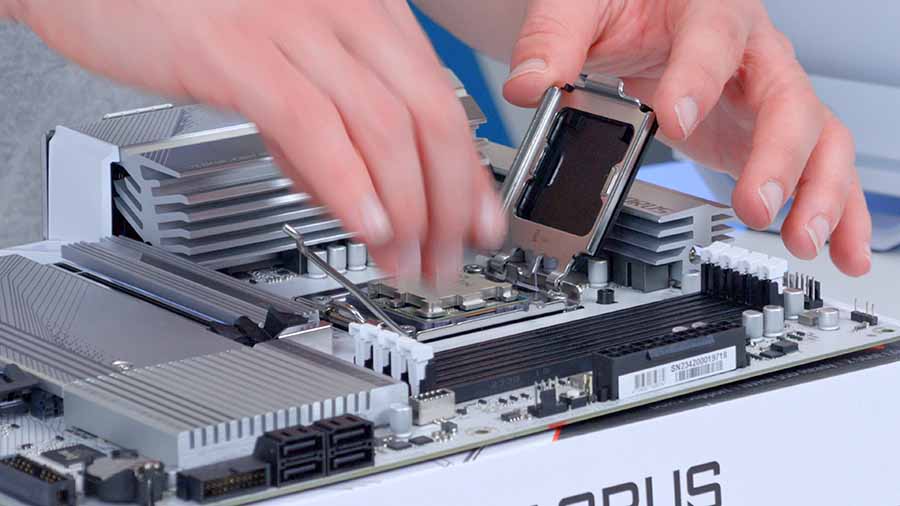
The socket cover can then be placed on top of the CPU, and the retention arm pushed down to secure the CPU in place. The plastic protector that is slotted in the top of the CPU socket cover will normally pop off once the cover has been tensioned, but it can be removed beforehand to save it from flying off elsewhere. The retention arm requires a fair bit of force to be fully secured, but don’t worry; this won’t damage the CPU.
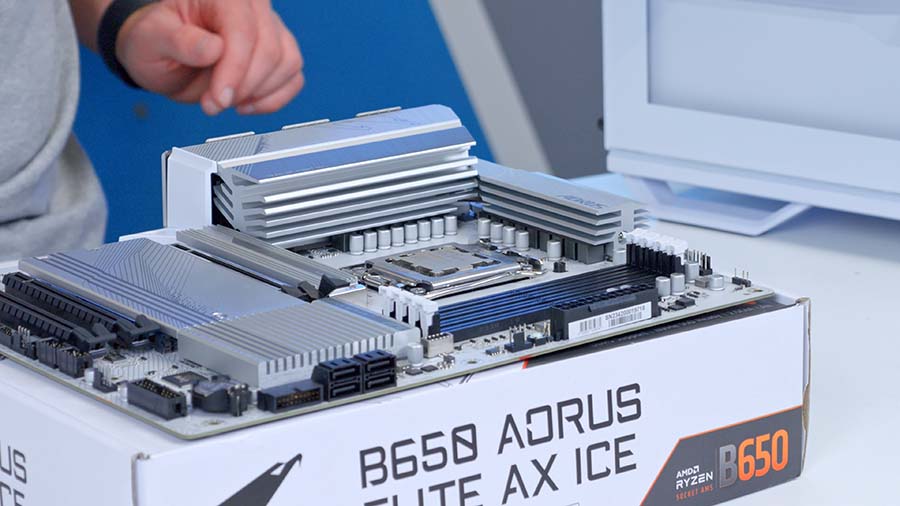
We chose the Gigabyte B650 AORUS Elite AX ICE motherboard for this PC build. This gorgeous board utilises an entirely white design on the heatsinks and PCB and is one of the few boards on the market with a completely white aesthetic.
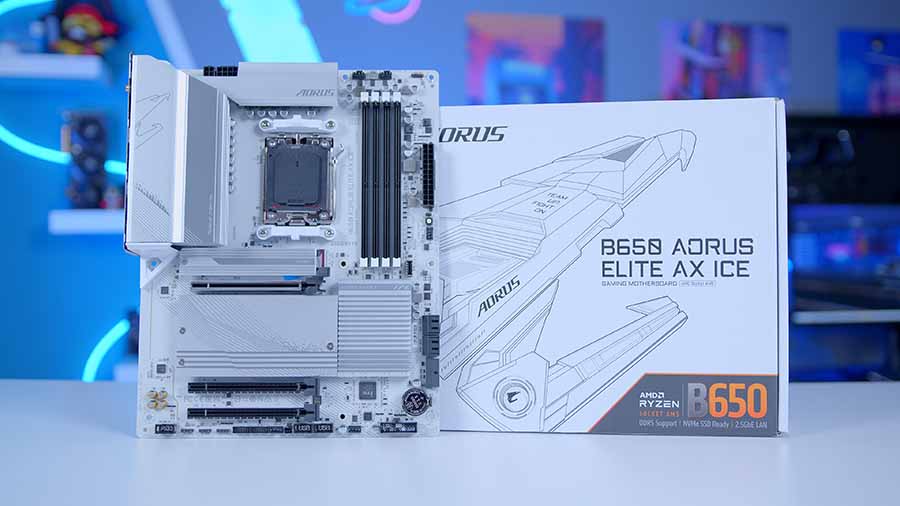
The B650 AORUS ELITE AX ICE is a very well-balanced board, sitting at a lower price compared to X670 and X670E motherboards while providing a great set of features that caters to high-end systems. The B650 AORUS Elite AX ICE comes with a Gen5 SSD slot, twelve USB ports comprised of USB 3.2 Gen1 ports or higher, along with WiFi 6E networking and 2.5 Gigabit LAN, providing a high-speed wired option.
| Specification | Gigabyte B650 AORUS Elite AX ICE |
|---|---|
| Form Factor | ATX |
| Supported Memory | 192GB DDR5 8000MT/s |
| PCI-E x16 Slots | 1 x PCI-E 4.0 |
| PCI-E x4 Slots | 1 x PCI-E 5.0 2 x PCI-E 4.0 |
| Front IO | 1 x USB 3.2 Gen2x2 Type-C 1 x USB 3.2 Gen1 2 x USB 2.0 |
| Rear IO | 1 x USB 3.2 Gen2 Type-C 2 x USB 3.2 Gen2 Type-A 5 x USB 3.2 Gen1 Type-A 4 x USB 2.0 |
| Audio | 3 x Audio Jacks |
| Networking | WiFi 6E 2.5 Gigabit LAN |
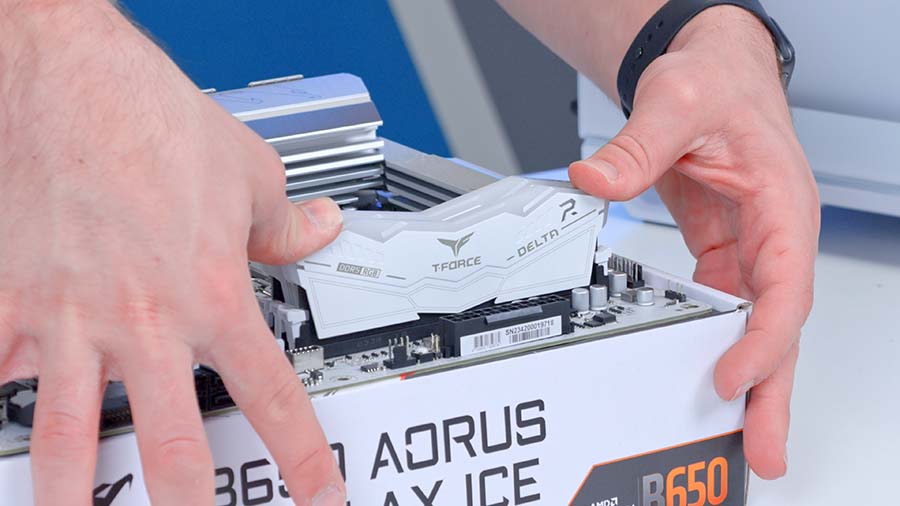
Step 2: Slot in the RAM
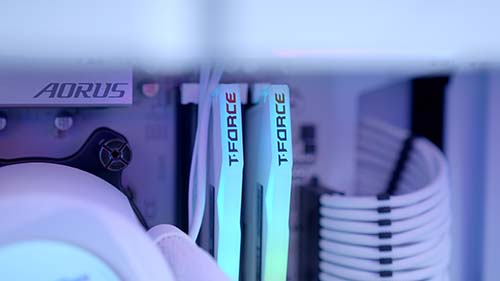
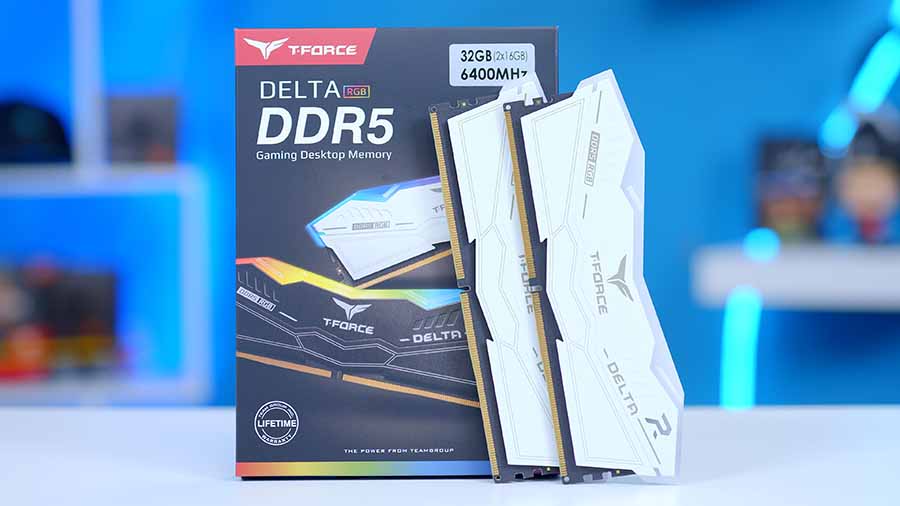
For our choice of RAM, we’ve picked out the Teamgroup T-Force Delta DDR5 RGB White kit, which comes in a 32GB capacity and is rated at a speed of 6400MT/s with a latency of CL40.
While we could have picked up a higher speed kit thanks to the support for 8000MT/s RAM on the B650 AORUS Elite AX ICE, the Teamgroup T-Force Delta RAM is an affordable kit that provides solid gaming performance for this build. Furthermore, it fits in with the white theme very well and contributes to the gorgeous RGB lighting of this system.
Push down the clips that secure the DIMMs to install the RAM. We’ll place the RAM sticks in slots two and four, as this is the most efficient configuration for just two DIMMs.
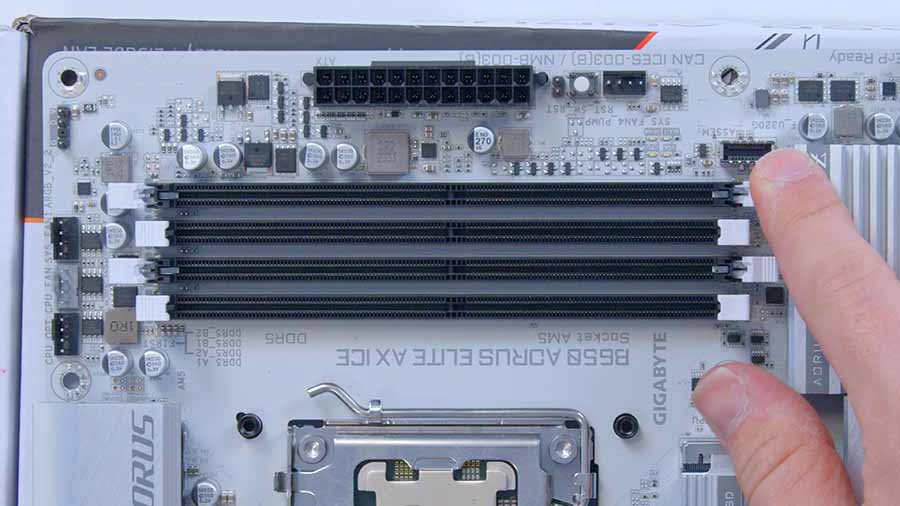
Line up the RAM with their respective slots and push down firmly until you hear a click. Press down on both sides to ensure even pressure is applied, reducing the risk of damage to the slot or DIMMs.
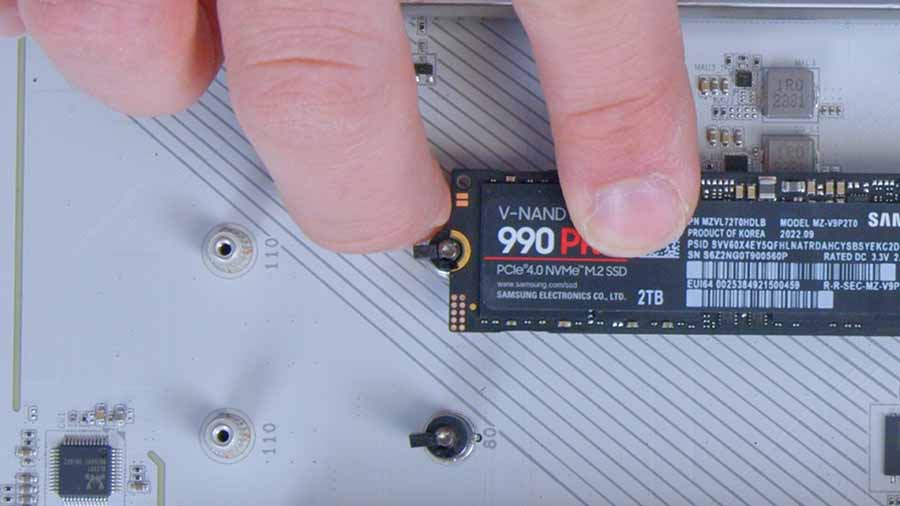
Step 3: Secure the M.2 SSD
The SSD we’ve picked for this PC build is the Samsung 990 Pro 2TB, a Gen4 titan that offers over 7000MB/s across the read speeds and 6900MB/s on the writes. This M.2 SSD is one of the most capable PCI-E 4.0 drives and is ample for this build, minimising game load and PC boot times.
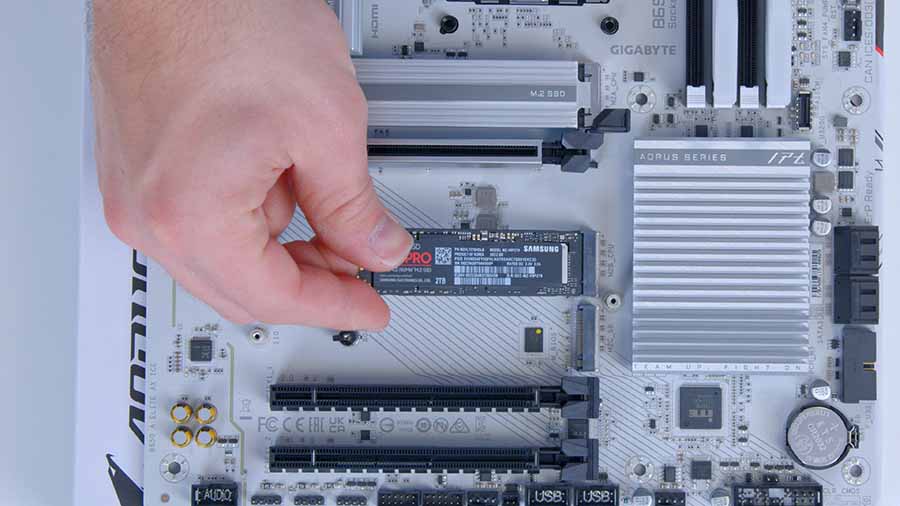
To install the SSD, you must ensure you have a screwdriver with a thread that is small enough to remove the heatsink covering the M.2 slot. Unscrew the heatsink and slot the drive in place by lining it up with the connector on the board. Then, push the drive down slightly, and the EZ-Latch on the B650 AORUS Elite AX ICE will secure it.
Step 4: Placing the Motherboard in the Case
For the next step, you’ll want to install the motherboard in the case. The be quiet! Dark Base 701 case we’ve chosen fits perfectly with this PC build’s white theme. It offers matte white colouring across the entire chassis, including the three pre-installed 140mm fans and the cables. The be quiet! Dark Base 701 is incredibly feature-rich, providing an included PWM and ARGB hub and a customisable RGB front panel with lighting that can be changed on the fly with a button.
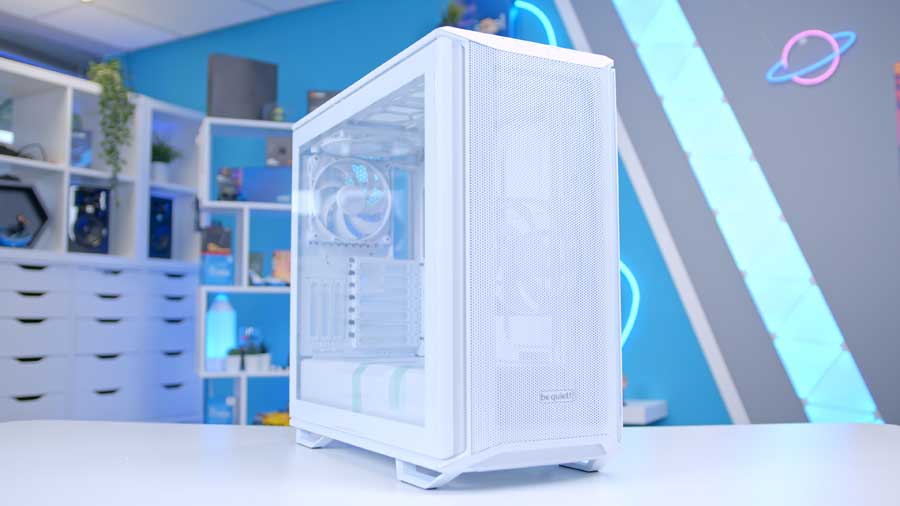
The Dark Base 701 also offers extensive support for a wide range of components, including mounting for 360mm radiators on the top and front panels or eight 140mm fans. Alternatively, it has space for graphics cards up to 415mm long and CPU coolers with a maximum height of 185mm.
| Key Specs | be quiet! Dark Base 701 |
|---|---|
| Form Factor | Mid-Tower |
| Motherboard Support | E-ATX, ATX, Micro-ATX, Mini-ITX |
| Case Dimensions (L x W x H) | 565mm x 249mm x 523mm |
| Front IO | 1 x USB 3.2 Gen2 Type-C 2 x USB 3.2 Gen2 1 x Audio Jack 1 x Mic Jack |
| PCI-E Slots | 7 + 3 |
| Colour | White or Black |
| Max Clearance | 185mm CPU Cooler Height 415mm GPU Length 250mm PSU Length |
| Drive Support | Up to 3 x 2.5 inch Up to 5 x 3.5 inch |
| Fan Support | Side: N/A Top: 3 x 140mm Front: 3 x 140mm Rear: 1 x 140mm PSU Shroud: N/A Bottom: 1 x 120mm |
| Radiator Support | Side: N/A Top: 360mm Front: 360mm Bottom: N/A Rear: 120mm |
| Pre-Installed Fans | 3 x 140mm |
To install the motherboard in the case, lay the case flat and line up the board with the nine standoffs around the motherboard tray. The rear IO should also sit flush with the cutout towards the top left of the case, allowing you to access the USB ports easily.
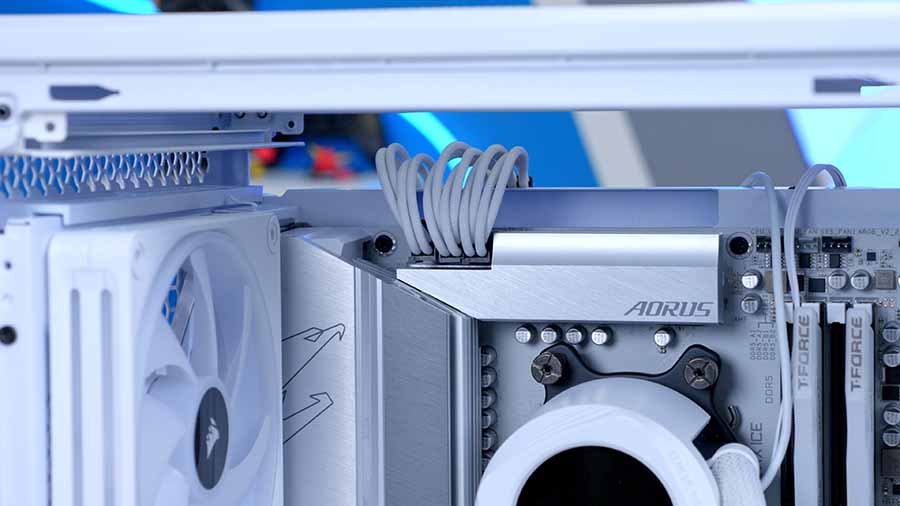
The Dark Base 701 has a small brown cardboard box of screws located in the PSU chamber, which contains all of the motherboard screws you’ll need to secure the board to the case. Once the motherboard is in place, take the four AMD mounting posts from the box of the AORUS WATERFORCE X II 360 ICE liquid cooler and screw them into the threads located around the CPU socket.
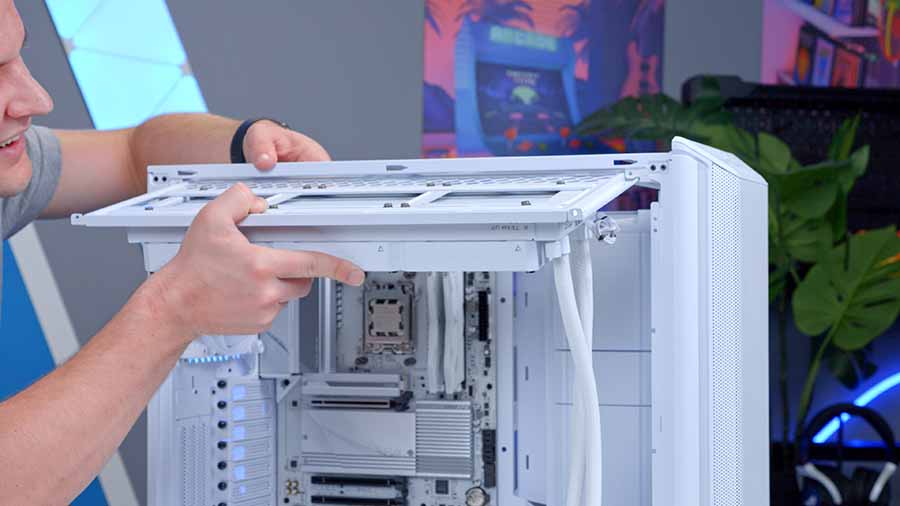
Step 5: Mount the Radiator to the Case
One of the unique features of the be quiet! Dark Base 701 is that the top panel is entirely removable, providing a much easier way to install a radiator or set of fans to the case. The radiator is held in by two screws located at the left and right corners towards the top of the case; unscrewing these allows you to remove the entire panel.
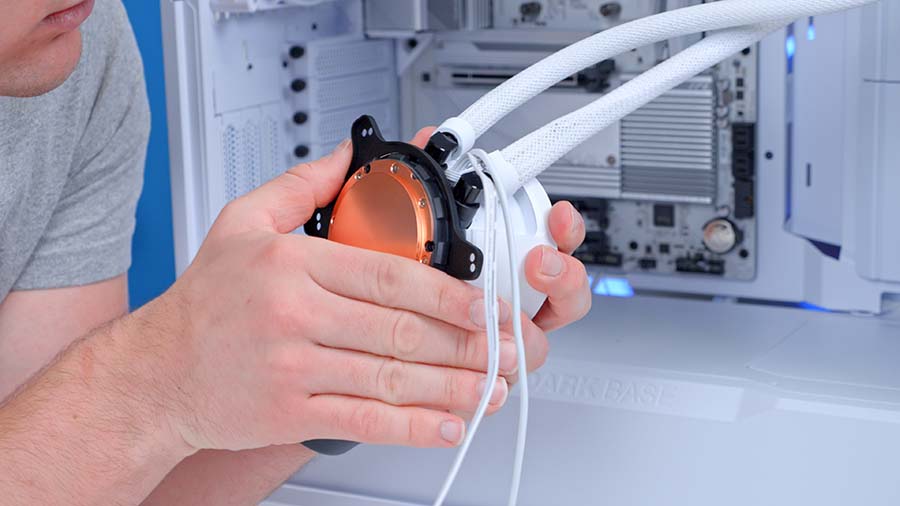
Once the panel is out, connect the three daisy-chained fans and screw them to the radiator of the AORUS WATERFORCE X II 360 ICE. The Gigabyte AORUS WATERFORCE X II 360 ICE is an excellent 360mm liquid cooler offering brilliant thermal efficiency. This awesome AIO provides a sleek white design and simplifies the building process thanks to the unique EZ-Chain Mag technology connecting fans and radiators through one cable.
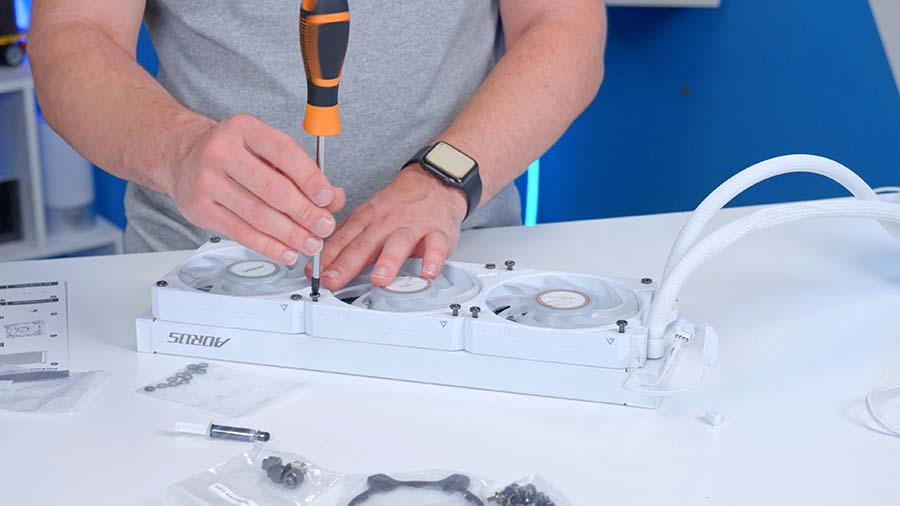
Before installing the Gigabyte AORUS fans, remove the pre-installed 140mm PWM be quiet! fan, which is the only fan located on the top panel mount.
The screws you’ll need to use are much longer thread than any other screws in this build so far. Ensure the fans are secured tightly, but don’t over-thread them, as it could damage the radiator. Before flipping the radiator over, make sure the daisy-chain connector is plugged into the fan and RGB cables poking out at the end of the tubing; this provides power and lighting control for the fans and cooler.
Next, flip the radiator over and secure the top panel to the unit with the twelve screws that come with the cooler. Again, don’t over-tighten these, but make sure the radiator is securely attached to the case panel. Once the fans and radiator are in place, the top panel can be put back in the case and then secured using the two screws that were taken out to remove the panel initially.
Step 6: Mount the Cooler to the Motherboard
Now that the cooler has been mounted to the case, we can secure the CPU block head to the Ryzen 7 7800X3D. The Gigabyte AORUS WATERFORCE X II 360 ICE doesn’t come with any pre-applied thermal paste, so you’ll need to squeeze some from the tube that Gigabyte provides onto the IHS (integrated heat spreader, which is the piece of metal on top of the processor) of the CPU.
Then, the mounting plate needs to be attached to the CPU blockhead. Line up the plate with the block head and rotate it clockwise to secure it to the cooler.
Finally, line up the screw holes over the posts that were installed on the motherboard earlier, and then use the thumbscrews that are in the cooler box to secure the CPU pump block in place. We recommend initially using thumb and finger strength to keep the CPU pump block from moving. After this, use a Phillips screwdriver, torquing the thumbscrews in the star pattern so that even pressure is applied to the CPU as you tighten it down.
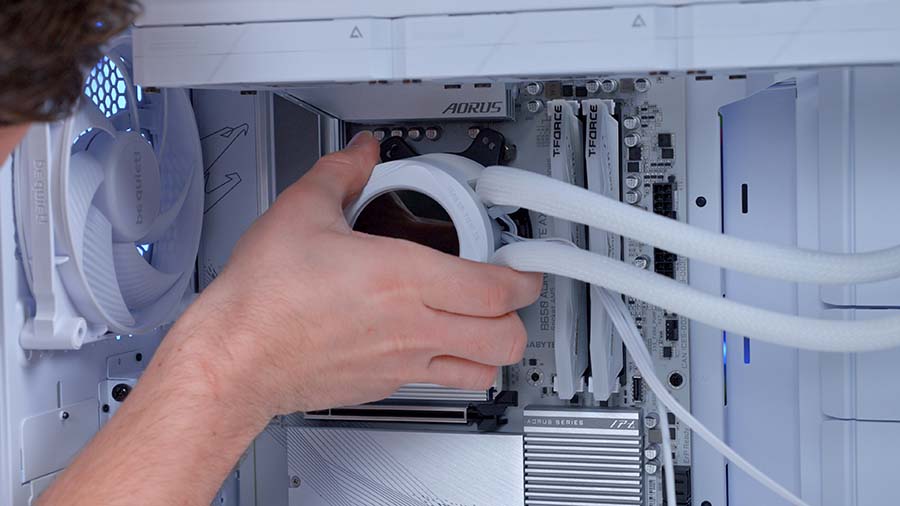
You’ll know that the CPU pump block is fully secured once the screws are rather tight and provide little to no movement. The thumbscrews should not be overtightened as this could damage the CPU or motherboard socket.
Step 6.5: Swap Out the Fans (Optional)
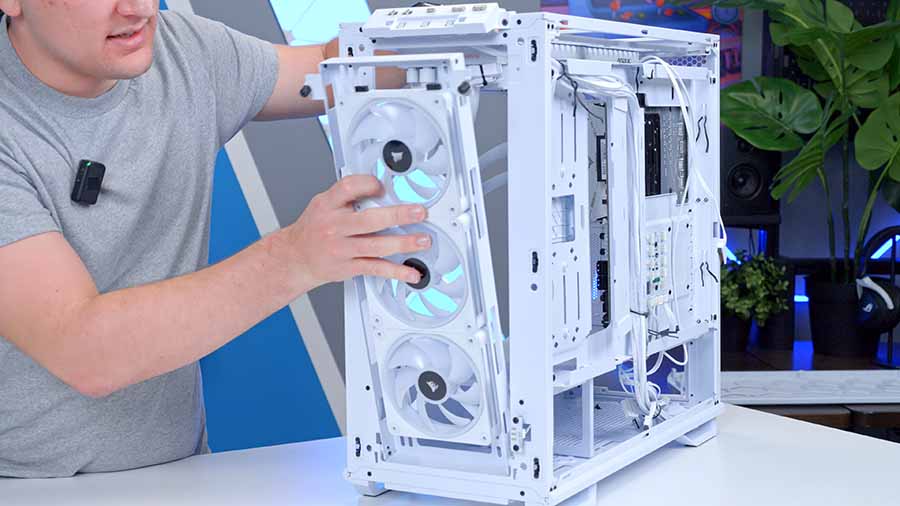
The 140mm be quiet! PWM fans that come with the Dark Base 701 are robust and fit the white theme of this PC build. However, we decided to amp up the aesthetic more with some Corsair QX iCUE 120mm RGB fans. These fans utilise Corsair’s renowned RGB lighting and provide extra airflow for the build, assisting temperatures. The fan at the rear of the case can easily be removed by unscrewing the four fan screws and then placing them back into the QX fans.
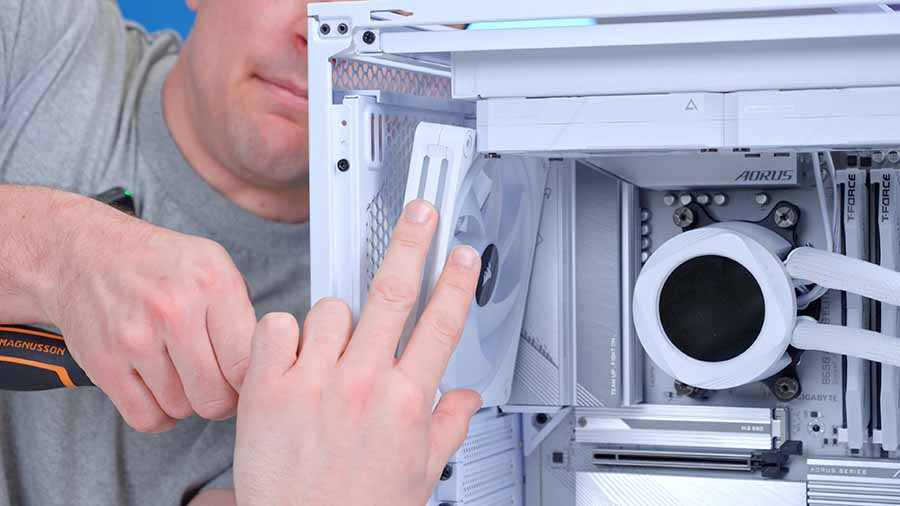
Like the top panel of the Dark Base 701, the front panel is also fully removable, allowing you to install or add fans easily. We added three more QX iCUE LINK 120mm fans and then secured the front panel back into the case using the thumbscrews attached to the panel itself.
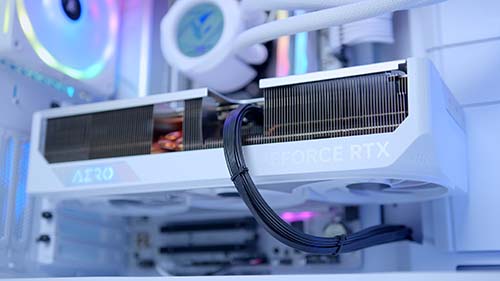
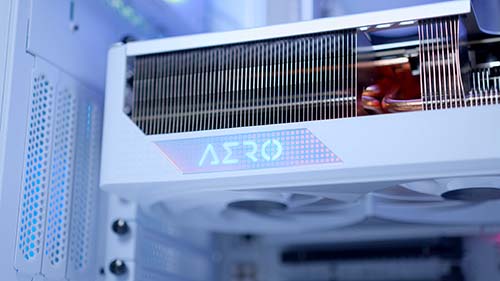
Step 7: Install the Graphics Card
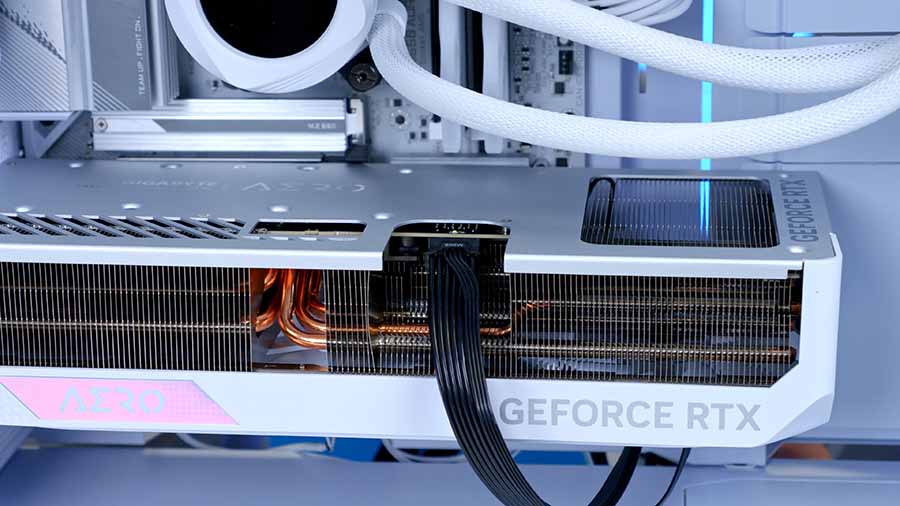
The next step in this PC build is installing the graphics card. We’ve chosen the Gigabyte AERO OC variant of the RTX 4080 SUPER, a mighty card with a clean white design. The RTX 4080 SUPER was the last card to launch as part of the RTX 4000 SUPER refresh. While this revitalised GPU didn’t receive any significant upgrades compared to the original RTX 4080, the MSRP drop to $999 makes the RTX 4080 SUPER an incredibly competitive option in the current market.
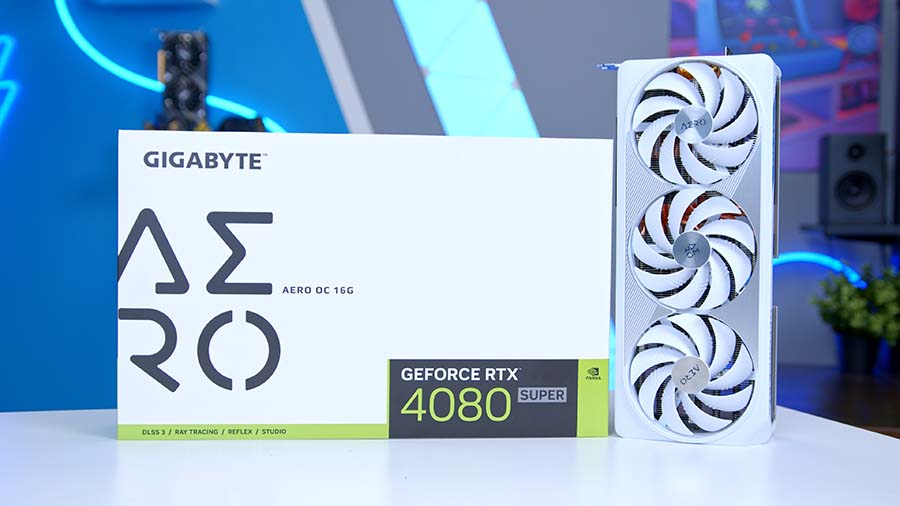
Performance-wise, the RTX 4080 SUPER is NVIDIA’s second most powerful RTX 4000 graphics card, offering high framerates at 1440p and 4K. The RTX 4080 SUPER targets those looking to play games with ray tracing enabled, as the high RT core count makes this GPU a strong performer with this technology switched on.
We’ve picked out the Gigabyte AERO OC version mainly because of its robust thermal design and sleek white aesthetic. Furthermore, the RTX 4080 SUPER AERO OC comes with a slight overclock to the boost speed, which improves gaming framerates and general performance.
| Specification | Gigabyte RTX 4080 SUPER AERO OC |
|---|---|
| Video Memory | 16GB GDDR6X |
| Memory Bus | 256-bit |
| Core Clock Speed | 2.29GHz |
| Boost Clock Speed | 2.55GHz |
| CUDA Cores | 10240 |
| RT Cores | 80 |
| Tensor Cores | 320 |
| Power Consumption | 320W |
| GPU Length | 342mm |
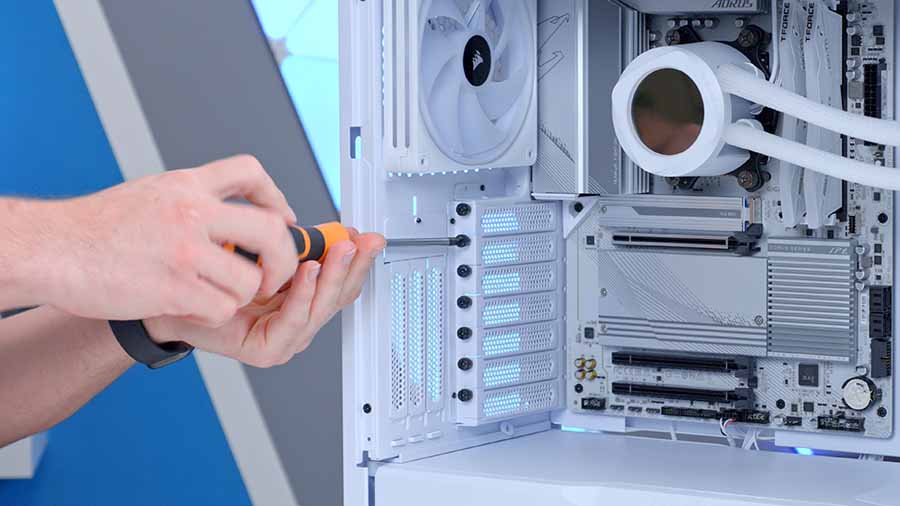
To install this GPU, the PCI-E covers on the Dark Base 701 case need to be unscrewed and then removed. The Gigabyte AERO OC version of the RTX 4080 SUPER is a three-slot graphics card, so three covers must be unscrewed. To avoid removing the wrong ones, we recommend lining up the card in the PCI-E slot without clicking it into place. This will show you which covers need to come out.
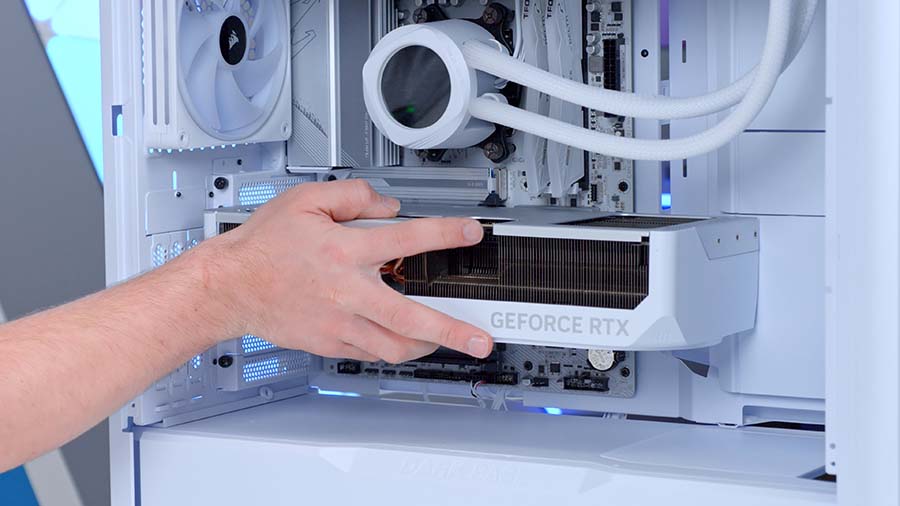
Once the PCI-E covers have been removed, line up the graphics card with the PCI-E slot and click it into place. You should hear a satisfying click, indicating the GPU is fully secured. Use the same screws that were in the PCI-E covers to keep the GPU from sagging.
Step 8: Power Supply Install & Power Cables
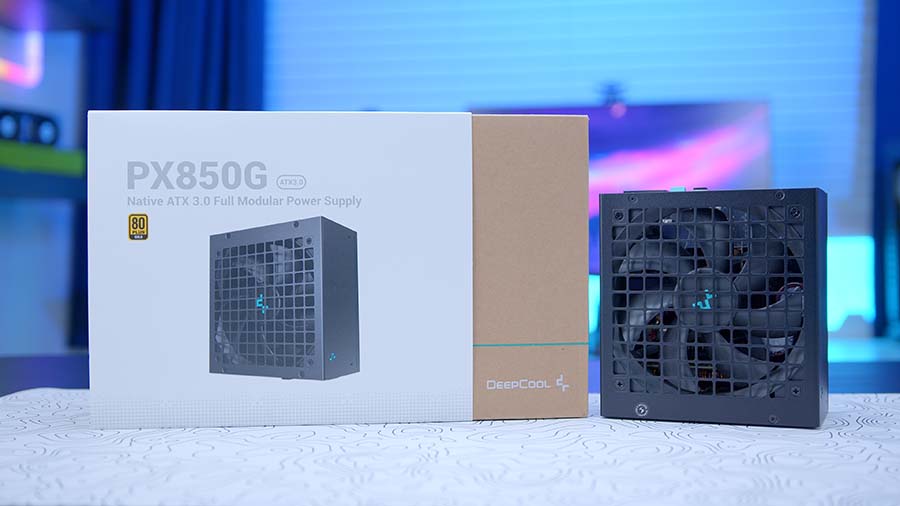
The final component of this PC build is the power supply, and we’ve chosen the DeepCool PX850G to power it. The PX850G is an ATX 3.0 unit that provides the 12VHPWR cable required for NVIDIA RTX 4000 graphics cards. The PX850G is also an 80 Plus Gold-rated power supply, providing this build with solid efficiency and minimising power lost as heat or noise.
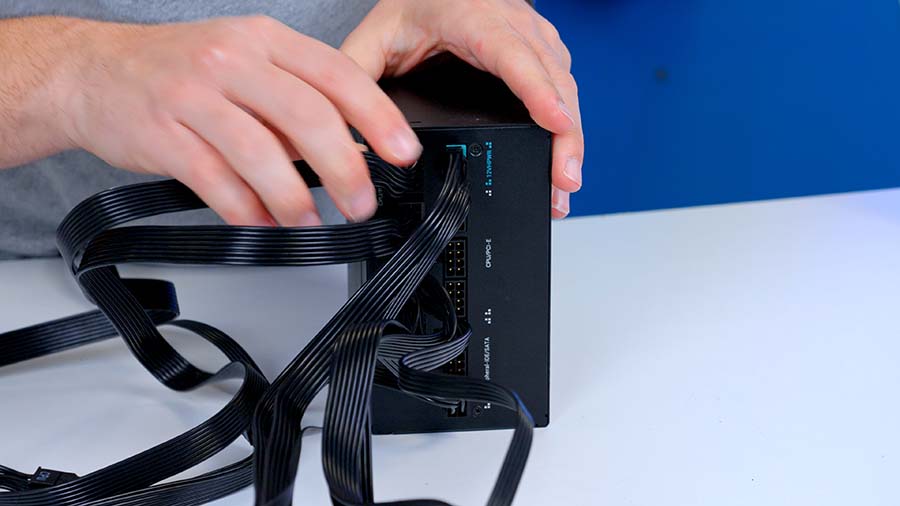
We advise wiring the power supply before putting the PX850G into the case. Because the PX850G is modular, you can pick and choose what cables you need to install, which makes the wiring process much more manageable. For this build, you will need a motherboard power cable, a CPU power cable with an 8-pin and 4-pin header, a 12VHPWR graphics card cable, and a SATA power cable.
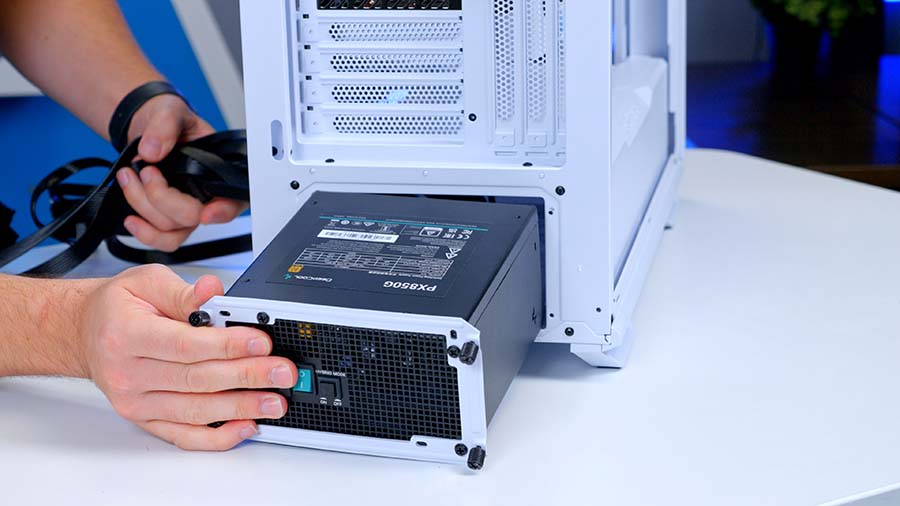
The be quiet! Dark Base 701 case uses a faceplate to secure the power supply in place, so this needs to be removed from the case and then secured onto the PX850G using the four hexagonal power supply screws. Then, thread the cables through and tightly screw the thumbscrews to ensure that the power supply is held in place.
Once the power supply is in place, you can plug in cables. For those unfamiliar with the cabling process, we’ve written a dedicated guide for cables and wiring, which covers the ins and outs of getting a PC wired up correctly.
Using the cable cutouts around the case, we recommend starting with the CPU, motherboard and graphics card power, as these are the easiest to locate. The motherboard power header is situated towards the right side of the board and is the biggest connector. It can only be plugged in one way.
The 8-pin and 4-pin CPU power headers are at the top left of the B650 AORUS Elite AX ICE motherboard. These can be a bit harder to reach with the CPU cooler installed; however, if you remove the screws securing the top panel in place, the cooler can be pulled out slightly, providing more space to work with.
The GPU header is physically located on the graphics card. The case’s cutouts allow the GPU power cable to be easily threaded through and plugged in.
Step 9: Final Cables & Turn On
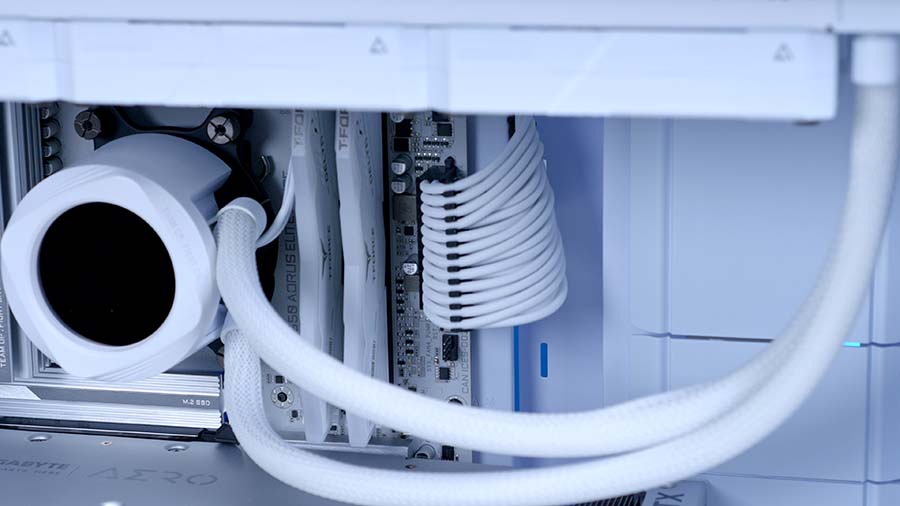
The final part of any PC build is ensuring that cables are plugged in correctly and managed, and then the PC build can be switched on. We always advise doing cable management in the middle of the build, which can save time later on. However, this final step can be used to plug in the rest of the cables, like fan and cooler power, front panel connectors, etc.
We’ve covered this in our complete cables and wiring guide, which we recommend having a read-through if you’re not familiar with this process. Take your time, double check everything has been plugged in correctly, and once you’re happy, turn on the PC build!

Performance
![]()
4K, High Settings
Avg: 185FPS
Preset: High
V-Sync: Off
Anti Aliasing: TSAA
Texture Filtering: 8x
Ambient Occlusion: High
Volumetric Lighting: High
Dynamic Shadows: Enabled
Model Detail: High
![]()
1080p, Comp. Settings
Avg: 330FPS
Preset: Low
V-Sync: Off
Render Distance: Far
TSR: Off
Global Illumination: Off
Ray Tracing: Off
Effects: Low
Post Processing: Low
![]()
4K, High Settings
Avg: 148FPS
Preset: High
V-Sync: Off
DLSS: Performance
Textures: High
Particle Quality: High
Tessellation: Near
Shaders: High
![]() 4K, High Settings
4K, High Settings
Avg: 84FPS
Preset: Recommended
V-Sync: Off
Anti-Aliasing: TAA High
Effects Quality: High
Texture Quality: High
Shadow Quality: High
Motion Blur: Off
From our benchmarking results, the RTX 4080 SUPER and Ryzen 7 7800X3D work harmoniously to offer solid performance at 4K across AAA games and Esports titles like COD Warzone and Apex Legends. The configuration for this PC build is highly capable and more than enough to handle the performance demands of 4K gaming.
Gallery