
Introduction
We’ve seen a huge surge recently in the amount of consumers jumping right into their first PC build. Embarking on your build can be daunting, but to help we’ve compiled a list you can follow along with and tick off as you go.
Our guide that covers all of the main components you need to build a PC, including peripherals and any tools you might need, too.
Suggested Article: How to Install Windows onto a New Gaming PC Build
Main Components
If one thing remains constant about any PC build, it is a list of core components. You can learn more about what each component does in our ‘What Is?‘ series of articles, or read our hardware reviews for a wide range of components.
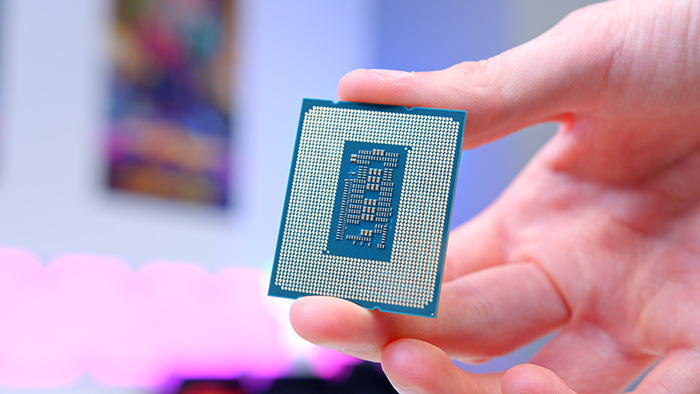
CPU
The CPU is arguably the most important component of any PC build, and an area where you will spend a large chunk of your money. Standing for ‘central processing unit‘, this part handles all of the calculations, logic and tasks that your PC will undergo. CPUs as a general rule are primarily square and slot into a CPU socket located on your motherboard. There are two main manufacturers that dominate the CPU space, Intel and AMD.
When buying an AMD CPU you’ll be looking at the Ryzen series of CPUs. AMDs existing stack of Ryzen 5000 CPUs are strong, and provide options for a range of buyers, but with Ryzen 7000 CPUs on the horizon you’ll have even more choice available. On the Intel side, your main options are the Intel 12th generation and 11th generation CPUs. The newest 12000, Alder Lake series are the most recent offering for consumers, bringing new features such as PCI-E 5.0, DDR5 memory support and widespread Gen 4 SSD compatibility.

Motherboard
A motherboard is effectively a large circuit board that connects all of your other components together. Dependent on the CPU you’ve chosen, the chipset and motherboard you pick will have a direct impact on the features available to you. For example, Ryzen 5000 CPUs currently do not have access to DDR5 memory or PCI-E 5.0 slots, but Intel’s latest motherboards do (dependent on your chipset).
Suggested: What is a motherboard and what are they for?
The price spectrum for motherboards varies massively, and ultimately the brand and type of motherboard that you pick out is entirely up to you as a consumer. Picking out the right motherboard for you can be a difficult task, something we’ve broken this down in our How to Choose the Best Motherboard guide. The best thing to do here is look at a range of motherboards, each with different prices and features. Pick out the features you need, and shop for a motherboard accordingly.

Graphics Card
A graphics card (or GPU) is likely to be the most expensive component in your build, and will also be the primary driving force for your build’s overall power consumption. A GPU is essentially an add-in card that is responsible for all of the output to your display and performance in games. Graphics cards synergise with all of the other components in your build, so it is important that you pick out a card that matches the power of your other parts.
Suggested: Best GPUs to Buy in 2022 – All of the latest cards compared!
RAM
RAM (often referred to as memory) is responsible for the short-term storage that your CPU needs to access constantly. To prevent your PC from slowing down, memory keeps regularly used data easily accessible in a faster form of storage. Memory modules, otherwise known as RAM DIMMs, have clock speeds that essentially make the transferring of data much quicker than a typical SSD or Hard Drive.
RAM is a vital component, but the capacity, clock speed and generation will affect the performance of your build. If you plan on putting a budget system together, 16GB of RAM will be perfectly fine, but for consumers looking for the best of the best, you’ll want to pick up a kit of four sticks with high clock speeds. It might even be worth considering the latest DDR5 RAM standard if opting for Intel’s 12 gen or AMD’s Ryzen 7000 series CPUs.
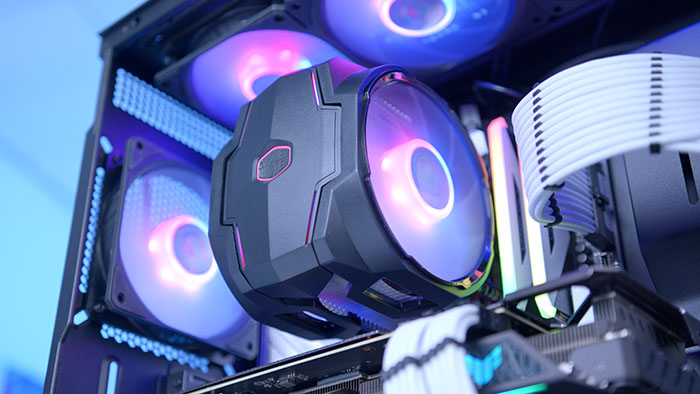
CPU Cooler
Quite simply, the purpose of a CPU cooler is to keep your CPU cool. Processors put out a fair amount of heat and for this reason they need their own individual cooling solution to prevent overheating.
There are two different types of cooling that you can choose – air or liquid. Air coolers are generally cheaper, but have less thermal capacity. Air-based cooling solutions generally consist of a heatsink fitted with heat pipes and fans to draw air through the system.
Liquid AIOs will have a pump and block that sits on top of the CPU, and a radiator that can be mounted within your system. This type of cooler is more efficient at dissipating heat, but will cost you more money in exchange. For more information on the latest coolers, read our articles covering the best coolers to buy and the best CPU and CPU cooler combos!
[adrotate banner=”7″]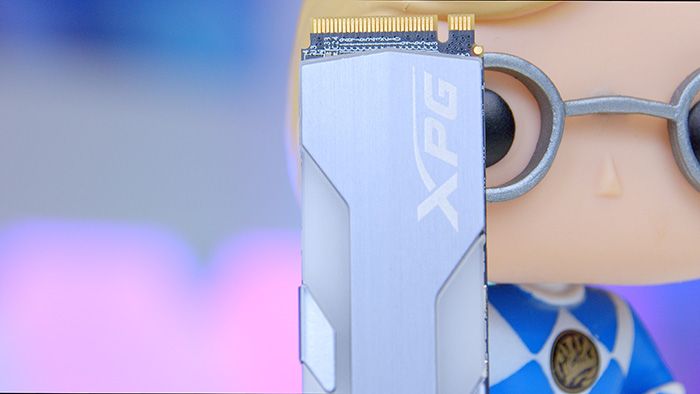
Storage
The storage you opt for will determine elements of performance, but also load times and bottlenecking within your system. There are two common types of storage – SSDs and Hard Drives. You’ll need some form of storage for your build in order to host your operating system and any games or applications.
The type of storage you decide to buy will have a direct impact on the load times for both your games and PC boot-up times. For example, a PC using a hard drive to boot could be facing up to a minute wait before it finally lands into Windows. An SSD on the other hand is likely to be in Windows within a matter of seconds from turning your PC off. As with all things, the major caveat to faster storage is unfortunately the cost – the faster the SSD, the more you’ll be paying per GB.
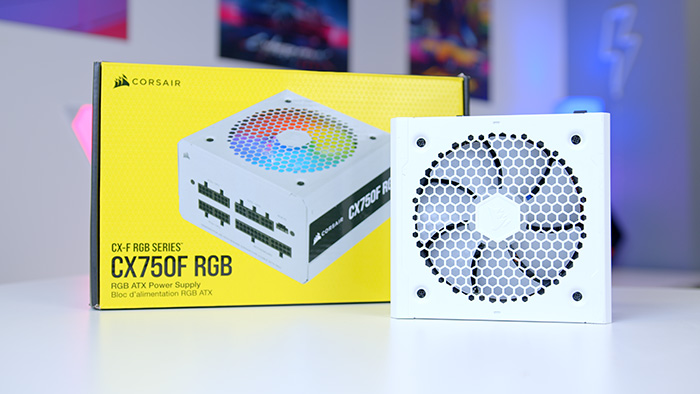
Power Supply
Your power supply (PSU) is responsible for providing the right wattage to the individual components within your build. Every power supply comes with power connectors that need to be connected up to each part, such as your motherboard, GPU and any storage drives.
When shopping for a PSU it is worth looking at the wattage, efficiency rating and whether the PSU is modular or not. Modular units allow you to solely plug in the cables you need, helping to keep cable management more simple and streamlined in a build. A power supply calculator will help you figure out the exact wattage you need, and we’ve also put together a guide which covers how to choose the right wattage.
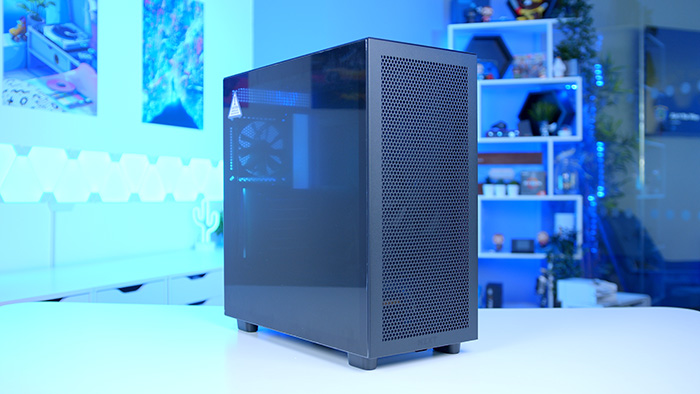
Case
A PC case is likely to be the last component you buy for your build. A case houses the entirety of your components, while also providing fans for airflow, and connectivity in the form of your power button, audio jacks and various USB ports.
The type of case you choose will depend on factors such as price, aesthetic, IO and more. You’ll want to ensure there is enough room for any water-cooling radiators, fans, the length of your GPU and height of a CPU air cooler. Make sure the motherboard you are opting for also fits, something that could create quite the anti climax web you build!
Operating System
Once you’ve finished the hardware side of your build, it is time to look at the software side.
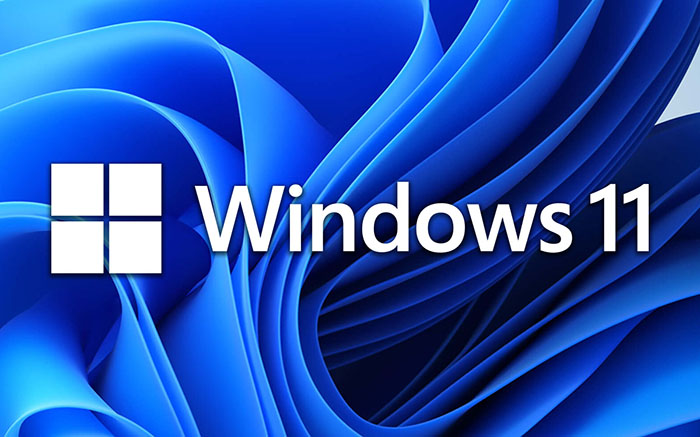
There are three main operating systems on the market (Windows, Mac OS and Linux), but we would recommend sticking with Windows for gaming. Microsoft’s Windows 10 and 11 provide a great track record for gaming, and are by far and away the most popular OS amongst gamers.
Ensure you’ve picked up a Windows license key ahead of time, in order to activate your Windows installation. We’ve covered off how to go about installing windows, and the process of creating bootable USB media in our full Windows 10 & Windows 11 installation guide.
Note – Microsoft’s Windows should only be downloaded from Microsoft’s official website page which can be found on our Windows installation guide. Windows license keys should also only be bought from trusted and reputable retailers.
Buy Windows 11 on:
Buy Windows 10 on:
Peripherals
Although we’ve covered the main components to get your PC started, there’s still a couple of extra pieces that you’ll need to complete your build. You might have existing peripherals lying around, which you can use if you wish. If you’re starting from scratch, make sure you grab each of the items below:
Mouse

A mouse is required to be able to input instructions for your computer to act upon. A mouse is a requirement for any build, but the type of mouse you pick up is entirely up to you. The peripherals market is filled with options with many difference price points, and different types such as lightweight, ergonomic and gaming.
Keyboard
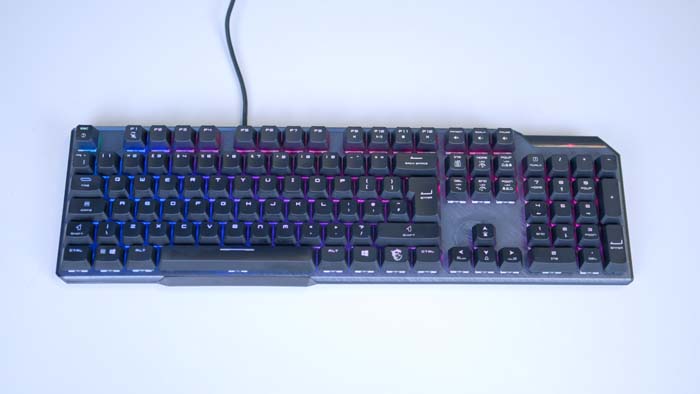
A keyboard is also another required peripheral to get your build completed. If you don’t have a keyboard you won’t be able to type, or spam the delete key to get into your BIOS. Similar to mice, there are a wide range of keyboards available for different types of builds with varying switches, keycaps and plenty of RGB lighting.
Monitor
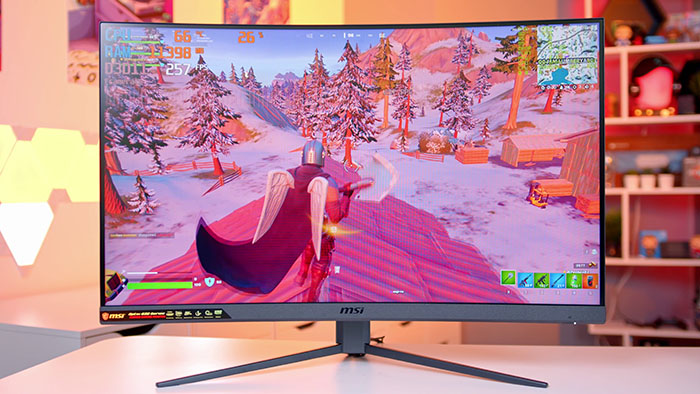
Monitors tend to be the more expensive peripheral option, but you need to be able to see what you’re doing. Monitors come in all different shapes and sizes with different refresh rates, panel types and resolutions. We’ve taken a look at choosing the best gaming monitor and we recommend going there for some well rounded options.
Tools you Need
Building a PC is a relatively simple process, but does require a few key tools:
Phillips Screwdriver
First off is a Phillips-head screwdriver. This tool will allow you to screw in the vast majority of the included screws for your PCs components. It is also worth having a secondary, smaller form-factor Phillips head for any small, M.2 screws in your build.
Thermal Paste
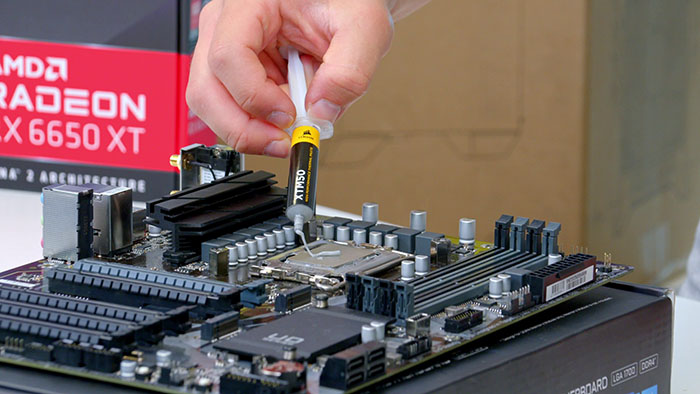
Thermal paste is vital for any build, creating a solid thermal bond between your cooler and CPU.
Most manufacturers provide thermal paste with their coolers, while some even have it pre-applied to the cooler itself.
Clear Workstation
A workstation might sound daunting, but what we mean by this is a flat area where you can put all of your parts together. If you’re building your PC on a surface where components could fall, you can risk damage.
How to Build a Gaming PC – Step by Step Guide
Step 1: How Install a CPU
The first step to getting your build started is by installing your CPU. You want to get yourself a nice clean area, take the motherboard out of the box and hold your CPU by the edges. Do not touch the underside where the pins or contact points are located.
Next, you need to lift up the retention arm located on the side of the socket, which will allow you to slot in your CPU.
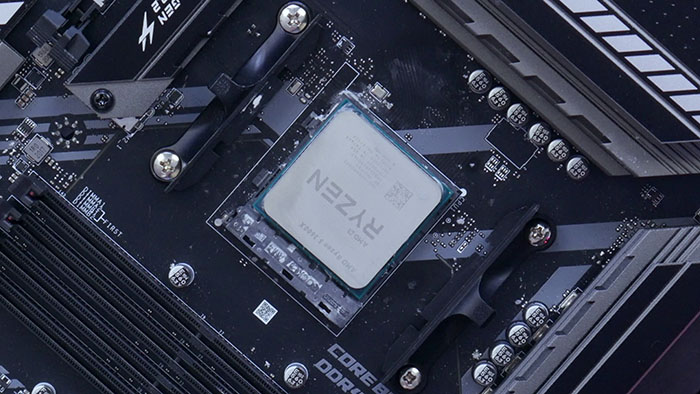
Ensure you are installing the CPU in the correct orientation – something you can do by finding the golden arrow on your CPU and the black arrow on your CPU socket. For AMD CPUs, the arrow is located on the underside near the CPU pins. For Intel processors, the arrow is located on the top side near the IHS. Match these two arrows, and that will ensure everything is matched up properly.
You do not need to apply any pressure to line the CPU up, and unnecessary pressure here can cause serious damage to the pins on the processor o the motherboard. Slowly drop the CPU in, and then close the retention arm. Fastening the retention arm can take some downward pressure, but you shouldn’t ever feel as though you are forcing anything.


Step 2: How to Install RAM (DDR4 & DDR5)
Installing your RAM is a much simpler process than installing the CPU. Locate the DIMM slots towards the top right of your motherboard, and pull back the retention clips on the top and bottom of the slot. Modern and high-end motherboards may only contain moveable clips on one side, simplifying the installation process somewhat.

Orientate the RAM DIMMs correctly by aligning the notch on the DIMM slot with the notch on the RAM DIMM itself. RAM can be only be installed in one orientation, so if your stick isn’t going in, spin it around and try again.
Another thing to be conscious of here is which RAM DIMM slots you should use (and by extension, which you shouldn’t). For dual channel configurations (two DIMMs in a four slot board), use the 2nd and 4th slots from the CPU. For single DIMM setups on a four slot board, use the second slot from the CPU. For single DIMM setups on a two slot board, use the first slot. It is always a good idea to double check the motherboard manual at this stage, as RAM configs can differ on a motherboard to motherboard basis.
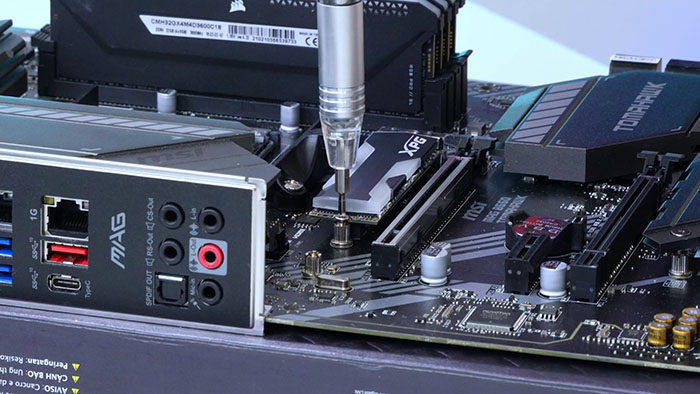
Step 3: How to Install an M.2 SSD
Installing your M.2 drive is relatively simple. You need to locate the primary M.2 slot (which will be the fastest). These slots are often located between the CPU socket and first PCI-E x16 slot.
To install an M.2 drive, line up the drive with the notches on the connector and then screw in the drive. You will need to push the drive downwards so it sits more flat, but excess pressure is not required for this stage.
The length of M.2 drives can differ and drives with included heatsinks will be naturally thicker. Make sure these two factors aren’t likely to impact compatibility in your build before installing. It’s uncommon to find issues here, but a little caution never hurt anyone,


Step 4: How to Move a Motherboard Into a PC Case


Now is the time to get your motherboard into your case. Locate all of the stand-off holes on your motherboard, and align these with the stand off locations in the case. If the case doesn’t contain stand-offs in the right place, use a pair of pliers to move these in order to ensure everything lines up.
Before finally screwing the motherboard into place, you’ll want to check for an IO shield. Many premium motherboard designs have an integrated one, but if you’ve picked up something more budget then you will need to install a manual IO shield yourself. Your IO shield will be a shiny silver plate that installs next to the rear case fan. This will come included with your motherboard.


Once you’ve installed your IO shield, you can start to manoeuvre your board into the case. Line up the board by placing the ports through the rear-IO shield, and secure into place with the included case screws. Don’t tighten these screws too much as this can risk damaging the board, simply tighten them enough so that your motherboard doesn’t move. If you have a larger form factor motherboard, like E-ATX, or smaller Micro ATX board this will increase the probability of standoffs not lining up first time.
Suggested: Mini ITX vs Micro ATX vs ATX vs E-ATX – What are the key differences?
Step 5: How to Install a CPU Cooler
CPU coolers can be a filly component to install, and certainly add complication into a build. This step is what where a range of photos is not likely to suffice, given the number of components and stages often involved in this part of a build.
For reference, take a look at two of our recent videos which include the installation of a liquid and air cooler to add variety to your build. The embedded videos below kick things off at the right time:

Air Cooler Example
Liquid Cooler Example
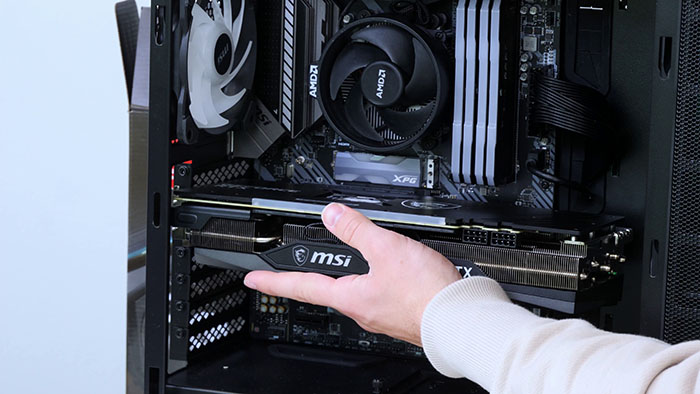
Step 6: How to Install a GPU
Arguably getting your GPU installed is the easiest part of any build. All you need to do is take the GPU itself and line the gold contact strip with your motherboard PCI-E slot. For pretty much all standard systems, you’ll be using the first x16, full length PCI-E slot.
You may need to apply some pressure to click this in, before promptly securing it with screws at the rear of the case. We’ll be adding power to the GPU in the next step of our How to Build a Gaming PC checklist.


Step 7: Power Supply and Cables
Installing the power supply is quite an easy step, but you will need to take care installing the cables that come from it.
All PSUs contain a fan, which you can position up or down to make the best use of your case’s vents or airflow setup. If you have a way to exhaust air from the bottom of your case then you will likely want to mount it fan side down.
To install the power supply, remove the rear side panel of your case, and slide in the PSU. If your power supply of choice is semi or full-modular we recommend plugging the cables in that you need beforehand. This step will help to keep cable clutter to a minimum.

You’ll find a selection of screws that look like the attached image, which you’ll use to fasten the power supply in on each corner. These screws will clamp the PSU to the case, and make sure nothing is likely to move.
Be cautious not to drop any screws through the power supply fan vent. While this may sound obvious, it can cause major damage later on. Remember, the PSU can be a dangerous component and is handling power delivery for your whole build.
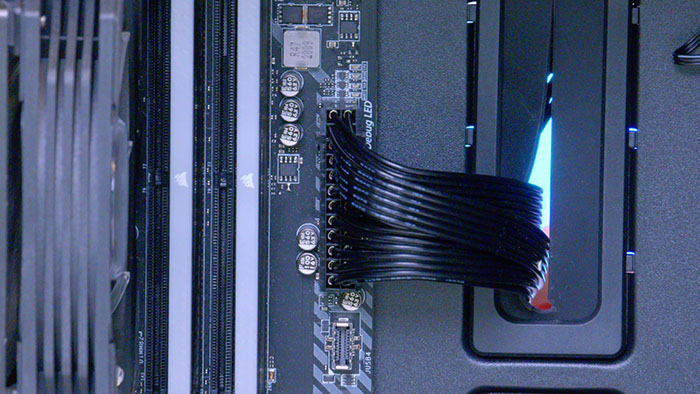
Once the power supply is in, you need to look at installing all of the included cables. Every build will include the following cables:


Some builds may require you to install multiple CPU power cables, while similarly others may require lots of SATA power headers to enable RGB controllers, fan controllers and other extras in your build. More powerful GPUs, like MSI’s Suprim X RTX 3090Ti, even require more than one pair of GPU power cables. Be sure to double check the wattage and included cables with your power supply before purchasing.
Step 8: How to Install Front Panel Connectors
Before powering up your new build, there is one set of pesky cables you’ll need to complete first! on your build, we need to plug in a couple more cables. Firstly you should locate a cluster of pins towards the bottom right of the board known as “JFP1”. This set of pins is needed to power the button to turn on your PC. If you’re unsure as to where the pins go, the picture we’ve provided has a diagram.
Once you’ve got all of the connectors in the right place you’ll also want to find “HD Audio” and “USB 3”.
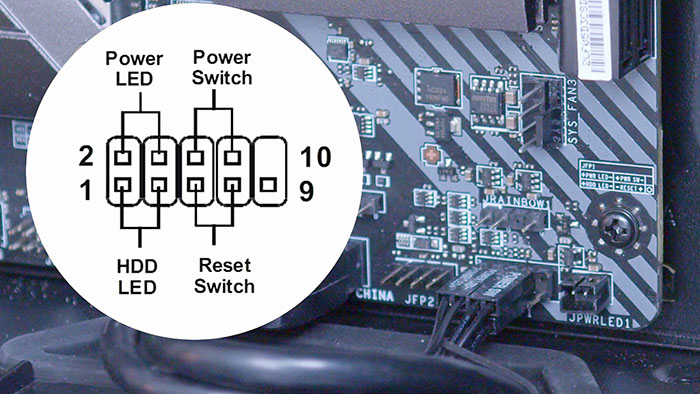
Both of these connectors are needed to power the front IO for your case. These don’t require precise action, you can simply plug in the connectors into their appropriate slots and you should be done.
Step 9: Cable Management
As we alluded to in Step 7, your build process can be made much easier by plugging in the cables, and tidying them away, as you go. With cases often including special channels and fasteners, you can more easily hide cables than before.
Even the best thought out builds still require some cable management at the end, though. Tie up cables by category, and ensure they run to the closest possible grommets and hideaways.

Step 10: Power on your Build & Install an OS
With the more tricky steps in the bag, you can power on your new build for the first time!
Ensure the kettle power lead is connected, alongside a mouse, keyboard and monitor. Some builds actually fail to build if they do not detect a valid keyboard! This is also the point of the process where you need to connect up the bootable Windows USB you prepared earlier.
Flip the power switch on the back to the on position to on and press your power button… Did it work? Yes! In which case, you’ve successfully built your PC.
You need to tweak one or two settings before gaming, which will be done within your BIOS. BIOS stands for ‘Basic Input Output System’, and is essentially a basic operating system for the back-end of your PC build. To get into the BIOS, you’ll want to spam the delete key on your keyboard as soon as you’ve hit the power button. This will prompt you to hit the BIOS. It is also common for a PC to go straight to the BIOS when you have no active Windows or Linus OS installation.
The BIOS can be a confusing place for a first-time builder, but we have published a full guide on Installing Windows 10 & 11 to a new Gaming PC, which covers the BIOS in many ways. A full checklist of what to do is included below:
| Step | Process |
| 1 | Enable ‘XMP’ > Set memory to the rated speed on the RAM box. |
| 2 | Change ‘Boot Order’ so that ‘Windows Bootable Media’ is first. |
| 3 | Set ‘Fan Curves’ to find the perfect mix of airflow and noise. |
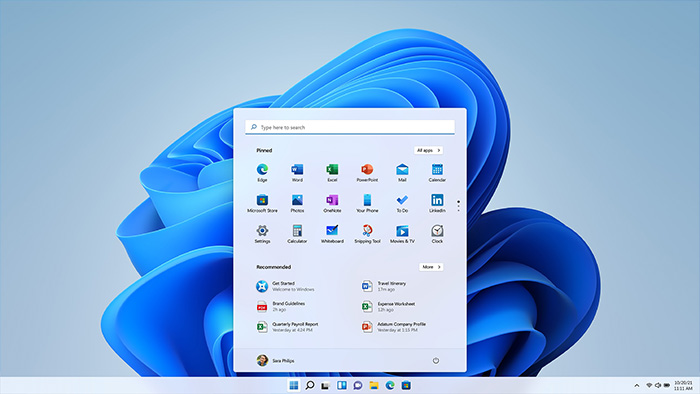
Provided everything went well, you should now see the Windows loading screen as your PC boots into the Windows installation. Installing the OS is a more simple process, where you’ll need to follow each of the relevant steps. You may also be asked to add a Microsoft Account at this stage.


Final Checklist
With all of those steps complete… you’ve successfully built a PC! It was a long journey, but we got there in the end. We’ve created a checklist containing all of the steps you should have taken to get your PC built. If something hasn’t worked, you can take a look at the table and click the appropriate steps to give you a clearer view on what could have gone wrong and what you should do to rectify it. If you’re yet to embark on your first build, why not take a look at our detailed Gaming PC Build Guides for the best part recommendations?
| ✅ | To Do List |
| 1 | Create Windows bootable media |
| 2 | Clear a workstation area to build in |
| 3 | Install the CPU |
| 4 | Install the RAM |
| 5 | Install the M.2 SSD or other storage |
| 6 | Install the IO Shield |
| 7 | Correctly installed the Motherboard |
| 8 | Install appropriate brackets for CPU type |
| 9 | Apply thermal paste to CPU |
| 10 | Mount air cooling or liquid AIO block |
| 11 | Mount fans to air cooling block or mount radiator |
| 12 | Remove PCI-E covers for the GPU |
| 13 | Install and secure GPU into x16 Slot |
| 14 | Plug in appropriate PSU cables |
| 15 | Install and secure PSU into case |
| 16 | Plug cables into components (with cable management) |
| 17 | Check all cables are secure |
| 18 | Plug in JFP1 power, HD Audio, and USB cables for case IO |
| 19 | Complete relevant cable management |
| 20 | Plug in a kettle lead to the PC & connect a mouse, keyboard, monitor and Windows USB |
| 21 | Ensure power switch on PSU is set to on (‘1’) |
| 22 | Change any BIOS settings including boot priorities |
| 23 | Restart and install Windows |


