Introduction
In recent years, the upward trend of component prices has made it pretty difficult to build a gaming PC that sits comfortably below the $1000 mark. With graphics cards being the main victim of the price hikes, gamers looking for solid 1080p performance on a tight budget have suffered the most, with many having to either shell out the extra funds or patiently wait for pricing to go down.
Luckily, the release of new GPU line-ups from both Nvidia and AMD has caused prices on RTX 3000 and Radeon 6000 cards to settle down again, meaning now is a better time than ever to build a budget gaming rig.
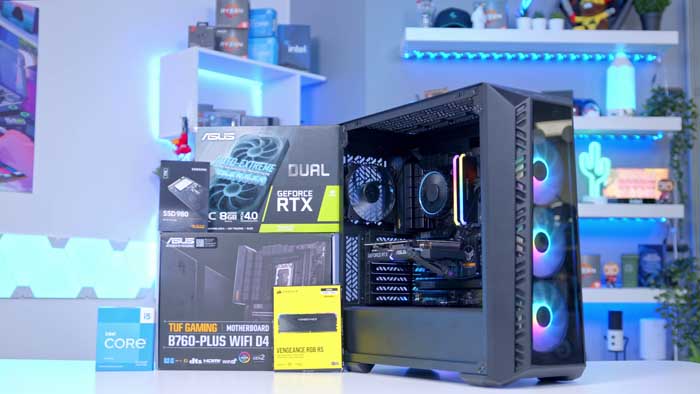
For this build, we’ll be putting together an affordable system that is perfect for 1080p gaming, decked out with all the latest and greatest budget-friendly components available. In typical GeekaWhat fashion, we’ll be providing a breakdown of all the parts used for this build, along with some gaming benchmarks in the latest titles and suggestions for peripherals to accompany this budget PC.
Suggested Article: Best Graphics Cards to Buy for 1080p Gaming in 2023
Main Components
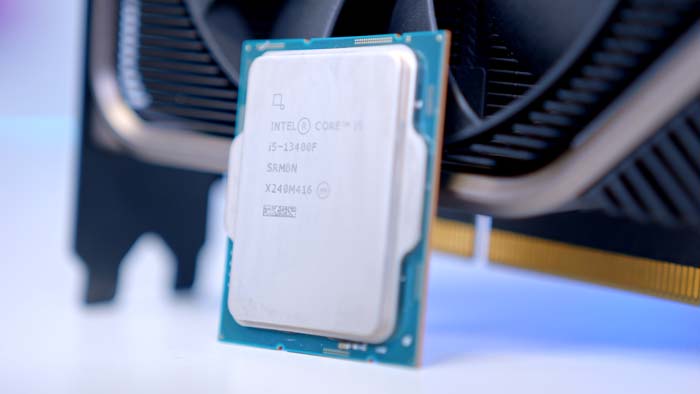
CPU: Intel Core i5 13400F
Starting off with our CPU of choice, we’ve opted for Intel’s Core i5 13400F. There are a lot of great i5 processors within the Raptor Lake line-up, but the 13400F is the cheapest options available, making it an ideal pick for budget builders wanting some extra processing power. Whilst the reduced price does lead to some performance setbacks compared to other performance options, the 4.6GHz boost clock speed will be more than enough to run the latest games at 1080p and 1440p.
The lack of overclocking and built-in graphics are unlikely to be a huge loss to budget gamers, as other components within a cheaper systems won’t be able to overclock either, which reduces the performance benefits of cranking up the processing power. Therefore, we suggest those gamers on a budget to pick up this CPU and prioritise cutting down the overall cost of their build.
Key Specs
| Key Spec | Intel Core i5 13400F |
|---|---|
| Base Clock Speed | 2.5GHz |
| Boost Clock Speed | 4.6GHz |
| Core Count | 10 |
| Thread Count | 16 |
| Max Turbo Power | 148W |
| Overclockable | No |
Things We Like
Strong 1080p performance: This CPU will have issues running all the latest titles at 1080p with high settings enabled, allowing budget gamers to focus on the task at hand.
Good value 13th-Gen CPU: Despite being the most affordable option for budget and mid-range systems, the i5 13400F still holds up fairly well compared to the more expensive offerings from Intel’s latest generation.
Things We Don’t Like
Not the best for productivity: Whilst this processor will provide a solid gaming experience, it will struggle with demanding productivity tasks such as editing and streaming.
Better value 12th-Gen options: Our testing showed that the i5 12600K outperformed the i5 13400F in a lot of gaming and productivity tasks, suggesting that grabbing this older CPU at a reduced price would offer better value for consumers.
Interesting in learning more? Check out our Intel Core i5 13400F review.
Where to Buy
Buy the Intel Core i5 13400F on:
CPU Cooler: Intel RM1 Stock Cooler
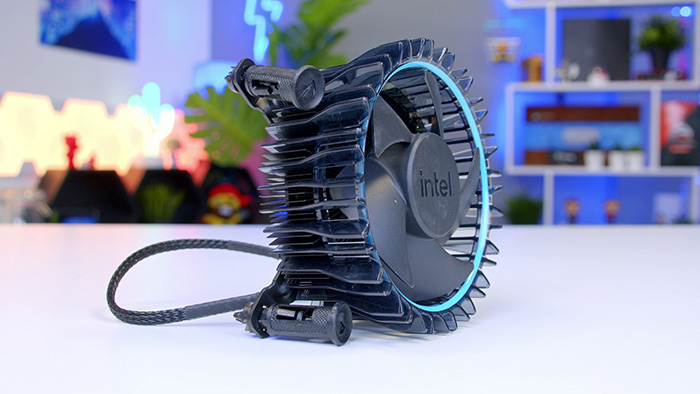
Our first major cost-cutting method is to stick with Intel’s RM1 stock cooler, which is included in the box with most Intel 13th and 12th generation CPUs. It’s always nice to have the bells and whistles that come premium air and liquid CPU coolers, but the RM1 does the job for our build. Because of this, it seems silly to splash out on a component that we already have, instead of putting those funds towards another component. Plus, the RM1 offers enough power to keep a budget system such as this one nice and cool.
Key Specs
| Key Spec | Intel RM1 Stock Cooler |
|---|---|
| Fans | 1 |
| Max RPM | 3150 |
| Connector Type | PWM 4-Pin |
| RGB | No |
| Size | 100mm x 100mm |
Things We Like
No extra cost: Due to this cooler being packaged in with Intel 12th and 12th generation CPUs, gamers won’t have to a pay any extra to receive the benefits of this cooler. This makes the RM1 an ideal choice for gamers on a budget.
Easy installation: It’s no surprise to see that the stock cooler fits snuggly with Intel CPUs, but this cooler is an absolute breeze to install compared to other budget coolers, especially when compared to the complicated liquid CPU coolers.
Things We Don’t Like
Lower thermal regulation: Though Intel’s stock cooling solution is an adequate choice for budget gaming PCs, dedicated CPU coolers from other manufacturers often provide better thermals thanks to more powerful fans and cooling methods.
Bland design: Honestly, this cooler looks pretty ugly and out of place in our build. It may be a worthy sacrifice in terms of money, but a smarter CPU cooler with perhaps a hint of RGB would be more pleasing to the eye.
Motherboard: ASUS TUF Gaming B760-Plus WiFi D4
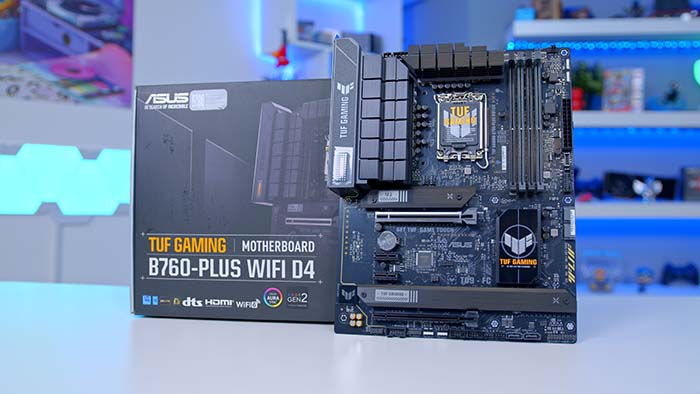
Our motherboard for this build is the ASUS TUF Gaming B760-Plus WiFi D4. Motherboards with a B760 chipset are the best choice for budget 13th-Gen systems, as they are affordable options that are specifically designed for Intel’s latest generation of processors. On top of this, they tend to offer plenty of support for recent components without having to mess around with adapters and external connectors.
We’ve picked ASUS’ TUF Gaming design in particular because it offers a strong set of connectivity features for a budget gaming PC whilst leaving an abundance of space for potential upgrades. For example, the PCI-E 5.0 GPU slot is well-prepared for the next generation of cards as soon as they release and the triple PCI-E 4.0 M.2 storage slots means you won’t be running out of storage options anytime soon.
Key Specs
| Key Spec | ASUS TUF Gaming B760-Plus WiFi D4 |
|---|---|
| Form Factor | ATX |
| Max Memory | 128GB DDR4 5333MHz |
| PCI-E x16 Slots | 1x PCI-E 5.0, 1x PCI-E 3.0 |
| PCI-E x4 Slots | 3x PCI-E 4.0 |
| Rear IO | 1x USB 3.2 Gen2x2 Type-C, 1x USB-C 3.2 Gen2, 3x USB 3.2 Gen1, 1x USB 2.0 |
| Networking | 2.5 Gigabit LAN, WiFi 6 |
Things We Like
Great aesthetic: We’re big fans of the industrial-based look on TUF Gaming motherboards as it adds a premium touch to any build for a fairly reasonable price.
Upgrade potential: With 128GB memory capacity and support for multiple graphics cards and storage options, this motherboard is a great choice for budget builders looking to gradually enhance their PC’s performance capabilities.
Things We Don’t Like
Networking options: The choice between wired or wireless is a nice inclusion that isn’t guaranteed on B760 boards, but having WiFi 6E instead of WiFi would provide more reliable wireless connectivity for online gaming.
Limited USB ports on rear IO: Even though the quality of the USB ports included on the rear IO is quite impressive, the quantity is limited compared to other B760 options and could lead to issues for gamers with lots of peripherals and accessories.
Want more information on this motherboard? Read our full review.
Where to Buy
Buy the ASUS TUF Gaming B760-Plus WiFi D4 on:
RAM: Corsair Vengeance RGB RS
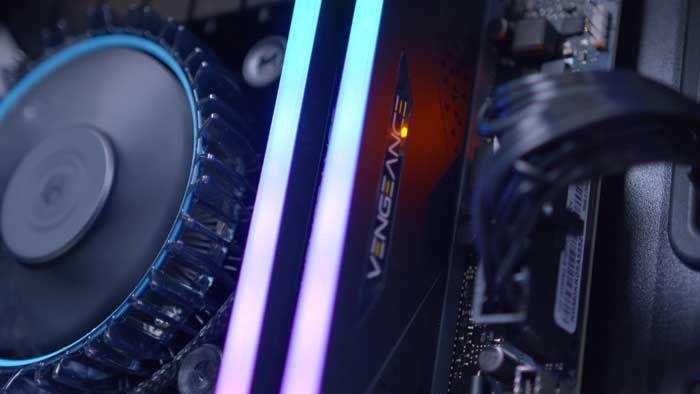
Memory is the one area where we’ve decided to splash the cash in this build, opting for a 32GB kit from Corsair. Most budget rigs should be able to suffice with 16GB of RAM, but 32GB will lead to faster loading times and offers more breathing room for games with lots of environmental structures and atmosphere. However, one aspect that we have skipped out on to reduce expenditure is DDR5 memory. Whilst it does offer increased clock speeds over DDR4, the performance are less effective than picking up a DDR4 kit with a higher capacity.
Corsair offer lots of great RAM kits with varying performance and price points, but we’ve gone with the Vengeance RGB RS this time around. This RAM offers 3600MHz clock speeds, meaning you will be able to spend more time in games instead of those pesky loading screens and contains a fairly low CL18 latency for smoother and more responsive gameplay. Adding to the solid performance, the DIMM sticks include a clean strip of RGB that can be customised in Corsair’s iCUE software, which adds a nice splash of colour to the inside of this build.
Key Specs
| Key Spec | Corsair Vengeance RGB RS |
|---|---|
| Kit Capacity | 32GB |
| Memory Speed | 3600MHz |
| CAS Latency | CL18 |
| RGB | Yes |
| Colour Options | Black |
Things We Like
High capacity memory: This 32GB kit will not only provide benefits in the short-term, but also increases the capacity of the vacant DIMM slots. Filling these out will lead to a grand total of 64GB of DDR4 memory, which is a bit overkill for a budget system.
Corsair iCUE compatibility: We’re big fans of any product that takes advantage of Corsair iCUE, so we’re happy to see it featured here. This software is one of the easiest to navigate, making adjusting lighting effects and monitoring performance hassle-free.
Things We Don’t Like
Pricier than 16GB: With 16GB being a much more affordable option, it may be hard for those on a tight budget to splash out on the 32GB kit. Luckily, the Vengeance RGB RS is also offers 16GB kits.
Only available in black: Whilst it doesn’t have much of an impact on this particular build, the lack of a lighter colourway makes this memory less than ideal for anyone looking to build a white-themed gaming PC.
Where to Buy
Buy the Corsair Vengeance RGB RS on:
SSD: Samsung 980 1TB
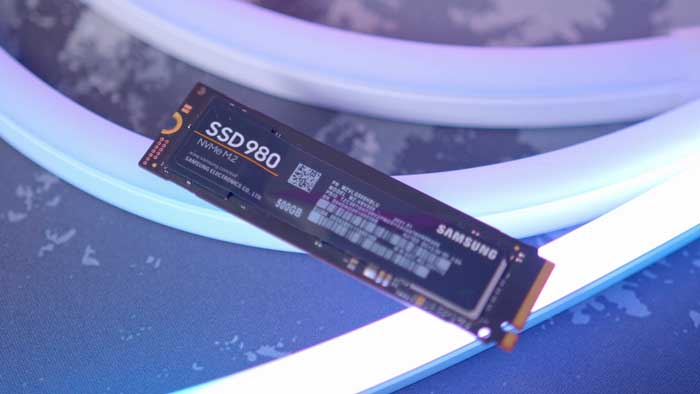
Our storage option for this build is the Samsung 980 1TB, a 3rd-gen SSD that will be able to store an extensive collection of the latest titles pretty comfortably. It seems that modern games are only getting bigger in scale, which means that 500GB SSDs simply won’t cut it nowadays. Instead of having to stack up on 500GB storage options out of the blocks, we’ve picked up this 1TB solution from Samsung.
This M.2 SSD is easy to install and will make more titles playable without the need to constantly be shifted games around or uninstalling data to clear up space. With read and write speeds that can hit 3GB/s, the 980 will allow titles to load up fairly quickly and helps to get rid of the boredom that comes with waiting for loading screens to disappear. Whilst a Gen4 drive would offer more efficient performance, the funds saved on storage will be better spent elsewhere.
Key Specs
| Key Spec | Samsung 980 1TB |
|---|---|
| Capacity | 1TB |
| Read Speeds | 3500MB/s |
| Write Speeds | 3000MB/s |
| Interface | PCI-E Gen3 x4 |
| Form Factor | M.2 2280 |
Things We Like
Easy to install: Like most M.2 storage options, this SSD is very easy to install as it simply slots into the motherboard. Also, the lack of a heatsink on this design helps to avoid any issues with the installation process
1TB capacity: For most gamers, 1TB of storage for their current games library is considered an adequate amount. This will roughly be able to hold 10 to 15 titles at once, or a few favourites on top of other important files.
Things We Don’t Like
Lack of heatsink: Though it may be slightly more beneficial to the installation process, a lack of a heatsink on the 980 makes it more susceptible to overheating. However, the fact that motherboards normally include M.2 heatsinks makes this issue less of a threat.
Pricing: Samsung’s 980 remains under the price of more recent Gen4 SSDs, but only by a small margin. Because of this, gamers wanting the best value may want to either spend a little more on a PCI-E 4.0 solution, or reduce costs with a cheaper Gen3 SSD.
Where to Buy
Buy the Samsung 980 1TB on:
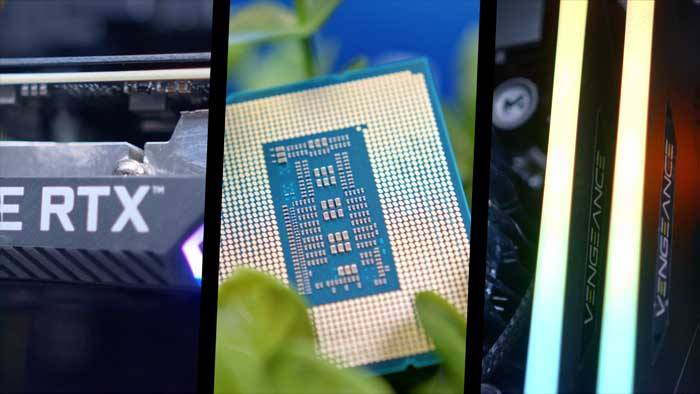
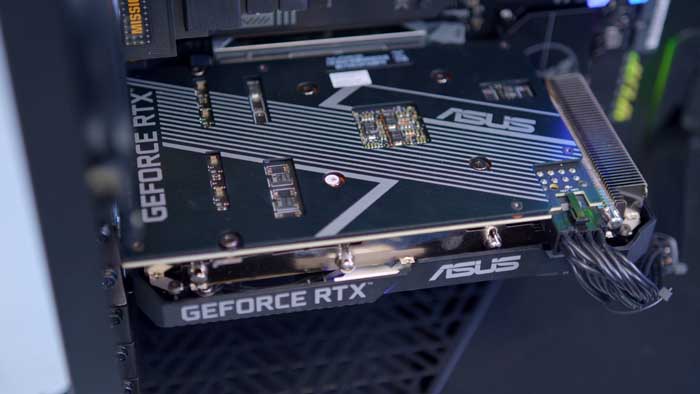
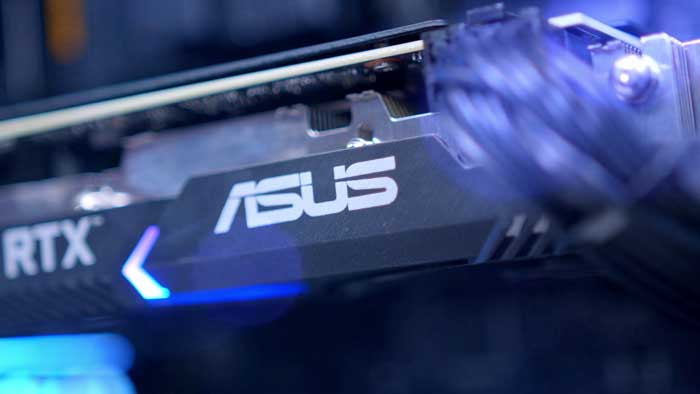
GPU: ASUS Dual RTX 3050 OC Edition
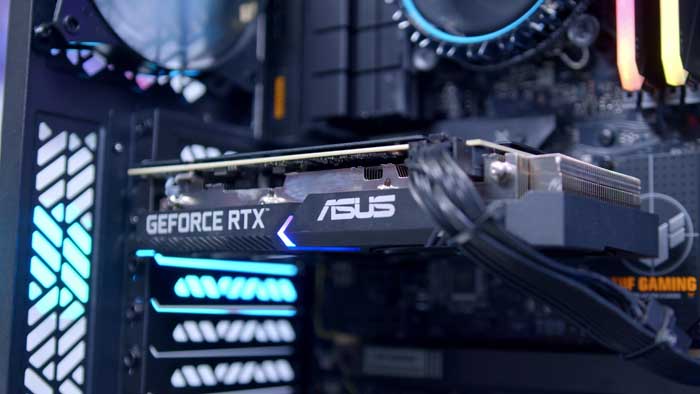
Moving onto the component that can often make or break the gaming experience- the graphics card! Unfortunately for the budget gamers, both AMD and Nvidia seem to be focussed on producing more expensive cards as of late, leaving the future of more affordable GPUs up in the air. However, the silver lining here that the release of new cards has caused prices to drop, making budget options from the previous generations more affordable than ever. Out of all of the cheaper options available, we’ve opted for the RTX 3050 in this build.
To be more specific, we’ve picked out the OC Edition of ASUS’ Dual RTX 3050, as this is one of the RTX 3000 series cards that is still readily available brand-new. With a boost clock speed of 1.82GHz, this card will be able to run games at 1080p pretty comfortably. Also, the dual-fan design keeps this GPU nice and compact, with the strip of RGB adding a small splash of colour.
Key Specs
| Key Spec | ASUS Dual RTX 3050 OC Edition |
|---|---|
| Base Clock Speed | 1.55GHz |
| Boost Clock Speed | 1.82GHz |
| CUDA Cores | 2304 |
| RT Cores | 20 |
| TDP | 130W |
Things We Like
Very affordable: The RTX 3050 is simply one of the cheapest GPUs on the market, especially when looking at the options from Nvidia. As a result, this card is the easiest way to receive benefits such as DLSS and G-Sync.
Solid 1080p gaming: This GPU is more than capable of hitting higher framerates when running games at 1080p, so most gamers should be able to perform as expected in competitive scenarios.
Things We Don’t Like
Better value options available: Those on a very tight budget will appreciate the value of the RTX 3050, but gamers with a little more wiggle-room may want to consider a slightly more expensive RTX 3060 or AMD’s 6650XT for a better gaming experience.
Simple design: Due to this card being one of the cheaper 3050 SKUs, the design choices are kept to the basics. Whilst we don’t think this design looks bad at all, it won’t act as an illustrious centrepiece for your PC.
Where to Buy
Buy the ASUS Dual RTX 3050 OC Edition on:
PSU: Cooler Master MWE Bronze 500
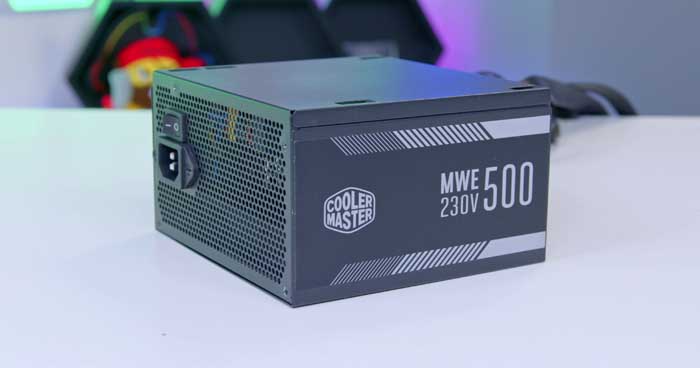
To power our system, we’ve gone for the Cooler Master MWE Bronze 500. We always recommend getting a power supply that is slightly above the recommended level to be on the safe side, which is why we’ve opted for a 500W option this time around. This PSU will offer enough power for to run all of the components featured in this PC build, whilst making sure that the price remains within budget.
We’ve used plenty of Cooler Master PSUs in the past and they have been a reliable choice that we have experienced minimal issues with. This particular option is a solid choice for those on a budget, as it prioritises the important aspects of a PSU while keeping the price nice and low. With an 80+ Bronze efficiency rating, this power supply will remain fairly quiet and cool, especially in a build like this in which the full wattage is not required.
Key Specs
| Key Spec | Cooler Master MWE Bronze 500 |
|---|---|
| Wattage | 500W |
| Efficiency Rating | 80+ Bronze |
| Modularity | Non-modular |
| ATX Standard | ATX 2.0 |
| Zero Fan Mode | No |
Things We Like
Supports 500W: As the recommended PSU wattage for our GPU is only 300W, the 500W limit on this power supply will be more than enough to handle the components within this PC, along with potential upgrades further down the line.
Very affordable: The no-nonsense approach that Cooler Master has adopted for this particular model makes for a effective way to save a good chunk of money, which can then be used for other components or add-ons.
Things We Don’t Like
Lack of modularity: The biggest weakness of this power supply is that is non-modular. This will make the building process more difficult than a modular option, as unused cables will have to be taken care of and can’t be removed.
Lower efficiency rating: Though 80+ ratings shouldn’t dictate your judgement on a PSU, they offer a good indicator of what to expect. A bronze rating should be fine for most budget systems, but it will be louder and produce more heat than 80+ Gold or Platinum rated PSUs.
Where to Buy
Buy the Cooler Master MWE Bronze 500 on:
Case: Cooler Master MasterBox 520
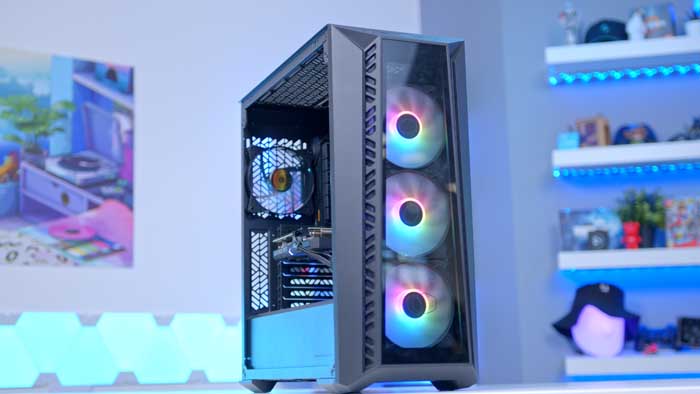
Putting this build all together into one neat package is another offering from Cooler Master, the MasterBox 520. This mid-tower case has a bunch of accessibility features that makes building a lot easier for beginners. For example, the removeable top panel makes installing fans or radiators along the top of the case less awkward and easier to control the placement of the fans. In addition, the larger size allows for wider compatibility with motherboards, which helps less experienced builders avoid picking up a board that won’t fit in their case.
Design-wise, the tempered glass panels allows all the RGB lighting to shine through, adding a premium look to this budget build. Plus, there is plenty of ventilation throughout the design, which is never guaranteed on a glass case, removing any concerns with airflow and internal temperatures. Finally, the mid-tower size provides plenty of room for all the components in this build whilst leaving space for upgrades.
Key Specs
| Key Spec | Cooler Master MasterBox 520 |
|---|---|
| Form Factor | Mid-Tower |
| Fan Support | 7 x 120mm, 4 x 140mm |
| Motherboard Support | Mini ITX, Micro ATX, ATX, SSI CEB, E-ATX |
| GPU Length Clearance | 410mm |
| CPU Cooler Clearance | 165mm |
Things We Like
Great for beginners: With lots of room for manoeuvrability and design choices such as a removeable top panel and screwless side panel, this case is a perfect option for less experienced builders picking up a budget PC.
Available in black & white: Though we have opted for the black case to match the rest of the components in our build, this case is also available in white, offering an alternative for gamers that would prefer a white exterior.
Things We Don’t Like
Pricing: The price of this case seems to fluctuate, but is generally more expensive than other mid-tower PC cases on the market. Whilst the adding practicality may be worth the small bump in price, those on a tight budget may want to browse for cheaper options.
Restricted E-ATX support: Budget gamers shouldn’t be affected too much by the limitations of E-ATX motherboards in this case, but the advertised E-ATX support comes with the caveat that could be an issue for those thinking about upgrading their system in the near future.
Learn more about this case in our in-depth review of the Cooler Master MasterBox 520.
Where to Buy
Buy the Cooler Master MasterBox 520 on:
Budget Peripherals
Every good gaming PC needs some high-quality gaming peripherals alongside it to forge the ultimate gaming experience. However, finding high-quality options on a budget can be quite difficult, leading to a waste of time and money for gamers that don’t know what to look out for. If you’re not sure where to start, here are a few of our favourite budget gaming peripherals available right now.
SteelSeries Rival 5 Wired Gaming Mouse
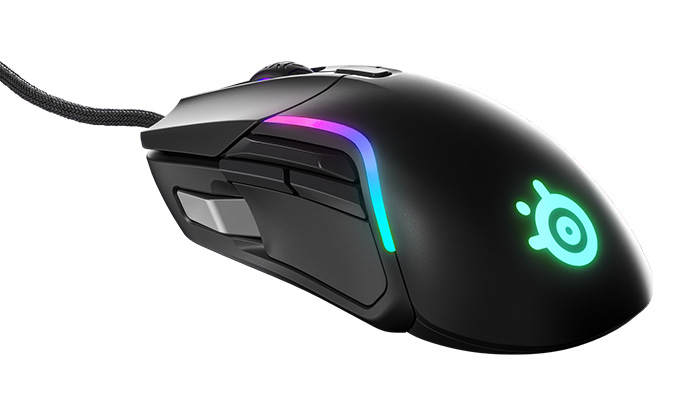
With a high 18K DPI sensor and 9 programmable buttons, the SteelSeries Rival 5 is a great hybrid design for gamers that want to play a wide range of games from multiple genres. Plus, the colourful PrismSync Lighting means this mouse looks and feels premium despite the cheaper price.
Buy the SteelSeries Rival 5 on:
Corsair K55 RGB PRO Gaming Keybaord

Another budget peripheral with stellar RGB is Corsair’s K55 RGB PRO. As a membrane keyboard, the K55 offers a less satisfying experience for typists, but the additional media controls and integrated wrist rest provides gamers with great ergonomics and practicality at an affordable price.
Buy the Corsair K55 RGB PRO on:
Logitech G335 Wired Gaming Headset

To round things up, we have the Logitech G335. This wired headset is extremely comfortable thanks to the floating headband and memory foam earcups. Available in black, white, or this striking mint colour, this headset will add a splash of colour, which can be altered with custom headbands too.
Buy the Logitech G335 on:
Benchmarks
So now that all of the components have been picked out and evaluated, it’s time to see how they perform together with some all-important benchmarks in a range of the latest and greatest titles. The benchmarks below will focus on the performance of the GPU compared to other cards from both AMD and Nvidia, as this is the most influential factor in terms of gaming performance.
After running this budget system into various games, our results show that the RTX 3050 holds up well in competitive titles, hitting that 144Hz sweet-spot with ease in the likes of Fortnite and Overwatch 2. In more graphically demanding titles, Nvidia’s budget-friendly card struggles to hit the higher framerates, but it will be enough to experience smooth gameplay on a budget system like this one.
Compared to the other budget cards on the market, the RTX 3050 outperforms AMD’s equivalent, the RX 6500 XT, in a number of titles, making it the better choice for an affordable 1080p experience. However, current pricing puts the RTX 3050 in competition with the more powerful RX 6650 XT, which the 3050 struggles to keep up with. Because of this, the 6650 XT is perhaps the best option for budget gamers looking for the best competitive gaming experience.
Warzone 2.0
91FPS Average
1080p High
GTA V
158FPS Average
1080p High
Overwatch 2
151FPS Average
1080p Ultra
F1 2022
156FPS Average
1080p High DLSS
Gallery